Roast Turkey with Oranges, Bay Leaves, Red Onions, and Pan Gravy

Wednesday, November 25, 2020

 GOURMET NOVEMBER 2001

Active time: 1 hr Start to finish: 4 hr

We think all turkeys are improved by brining (soaking in salted water), but it's a cumbersome process that few holiday schedules can accommodate. We found kosher turkeys, which are salted during the koshering process, to be just as flavorful and succulent as brined ones, without all the fuss. However, if you'd like to try brining, just stir together 8 quarts water with 2 cups kosher salt in a 5-gallon bucket lined with a large heavy-duty garbage bag, and soak turkey, covered and chilled, 10 hours. If you don't have room in your refrigerator, executive editor John Willoughby recommends brining in a large plastic cooler, using freezer packs to keep the water cool and replacing them as needed.


INGREDIENTS

  1. For turkey

  2. 1 (12- to 14-lb) turkey (preferably kosher), any quills removed if necessary and neck and giblets (excluding liver) reserved for making stock
  3. 1 1/4 teaspoons salt
  4. 1/2 teaspoon black pepper
  5. 2 navel oranges, each cut into 8 wedges
  6. 3 small red onions, each cut into 8 wedges
  7. 5 bay leaves (not California)
  8. 3/4 stick (6 tablespoons) unsalted butter, melted

For gravy
Pan juices from roast turkey
About 4 cups turkey stock (page 198)
1/3 cup all-purpose flour
  1. Garnish: 4 roasted onions, each cut into 8 wedges (optional); fresh bay leaves (do not eat)

  2. Special Equipment
    • small metal skewers or wooden toothpicks; kitchen string

  1. PREPARATION

    1. Roast turkey:  Preheat oven to 425°F.
  1. Rinse turkey inside and out and pat dry. Sprinkle turkey inside and out with salt and pepper, then fold neck skin under body and secure with small skewer. Stuff large cavity with oranges, 1 onion, and bay leaves. Tie drumsticks together with kitchen string and secure wings to body with small skewers.
    Put turkey on a rack set in a large flameproof roasting pan and roast in middle of oven 30 minutes.
      While turkey is roasting, toss remaining 2 onions with 2 tablespoons melted butter.
        Reduce oven temperature to 350°F. Brush remaining 1/4 cup butter over turkey and roast 30 minutes more. Baste turkey and scatter buttered onion wedges around it, then roast, basting turkey every 30 minutes (add a little water to pan if onions get too dark) until an instant-read thermometer inserted into fleshy part of a thigh (do not touch bone) registers 170°F, 1 1/2 to 2 hours more (total roasting time: 2 1/2 to 3 hours). Transfer turkey to a platter (do not clean roasting pan) and let stand 25 minutes (temperature will rise to 180°F).
          1. Make gravy:
            1. Transfer pan juices with onions to a 2-quart glass measure, then skim off and reserve 1/4 cup fat. Add enough turkey stock to pan juices to make 4 1/2 cups total. Set roasting pan across 2 burners, then add 1 cup stock mixture and deglaze pan by boiling over moderately high heat, stirring and scraping up brown bits. Add remaining stock mixture and bring to a simmer. Pour stock through a fine sieve back into glass measure and discard onions.
            2. Whisk together reserved fat and flour in a large heavy saucepan and cook roux over moderately low heat, whisking, 3 minutes. Add hot stock mixture in a fast stream, whisking constantly to prevent lumps, then simmer, whisking occasionally, until thickened, about 10 minutes. Stir in any additional turkey juices accumulated on platter and season gravy with salt and pepper.
            3. Serve turkey with gravy on the side.
            4. Reader Comments:
          2. I've used this recipe every year since I found it in an issue of Bon Appetit I found in the waiting room at a car dealership. I sounded so good, along with other recipes in that issue, that I stopped at a store to buy a copy on my way back home. It is always a big hit with my family. [I ALWAYS brine it in a herbed apple cider brine which I came up with myself.]


          3. This has been my go-to recipe for the bird every year since it came out. Nothing makes a better flavor. The brining makes a tender, moist, flavorful bird every time, as do the onions and oranges. It's just a variation on the yellow onion and lemons that I use when I roast a chicken, but it makes turkey taste special to use something different.

        Tolan's Bread Pudding Recipe

        Tuesday, November 24, 2020

        December 29, 2014

        Ingredients

        1. ½ stick of butter at room temp 
        2. 1 cup of sugar 
        3. tbsp of vanilla extract or bourbon or grand mariner  
        4. pinch of salt 
        5. 4 eggs 
        6. 2 ½ cups of half & half or light cream or a mix of milk & cream 
        7. 3 cups of day old bread cut in cubes 


        Variations (optional) 

        You can add the following combo to the bread pudding: 

        Apple & raisins or cranberries 

        Chopped chocolate & raisins 


        To plum up the raisins or cranberries, I cook them in orange juice until soft & cool 


        1. Using a hand mixer, mix the butter; sugar; vanilla and salt until well mixed.  
        2. Add the eggs and beat until well mixed.  
        3. Add the cream and mix well.  
        4. Add the bread and any of the variations.  
        5. Let the bread soak for 10 min., in the meantime, turn the oven to 350.  
        6. Pour the pudding in a butter rectangle pyrex glass, cover with foil and bake for 35min; uncover and broil until golden.  
        7. Remove from oven and let rest for 15 min.   

        Storing Garlic For Eating

        Saturday, November 21, 2020


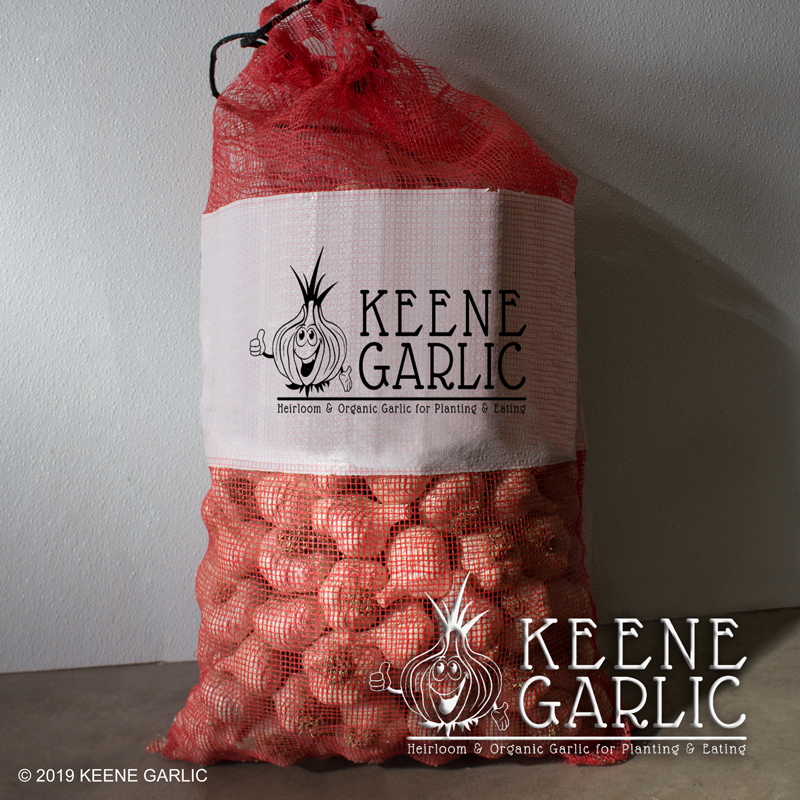
        Garlic in netted bag for storage

        Refrigerating Garlic

        To get the longest storage life out of garlic, we do recommend putting the garlic bulbs in a brown paper bag and putting them in the crisper drawer in the refrigerator. When they come out of cold storage, they will want to sprouting thinking it is time to grow, so only take them out as needed.  After the garlic has been in cold temperatures, if you leave the garlic out in normal temperatures, it will sprout and deteriorate quickly.  That is why the garlic purchased from the stores does not last long because it has been kept cold and then sits out in the stores and then sprouts and goes bad quickly once you purchase them.  

        Sprouting

        Garlic sprouting is a natural part of the garlic’s life.  It will sprout after it has been through a cold period, and it starts to warm up and thinks it is time to grow.  That is why grocery store garlic sprouts, because not only is the garlic usually old since it is imported from other countries, but it was also put in cold storage to extend the life of the garlic.  We do not put any garlic in cold storage before it gets to our customers. Our garlic sees normal household temperatures until it gets to you.

        Spouts have 13% more nutrients than the garlic cloves, so remove the sprout and eat it before cooking to get the superior health benefits from the sprout. If the sprout is cooked, some say it turns bitter.

        -----------


        Storing Garlic For Eating

        Storing garlic uncovered, such as in a wire-mesh basket inside your cupboard or beneath a small overturned clay pot, is ideal. You can also store garlic in a paper bag or mesh bag. Just be sure there is plenty of dry air and little light to inhibit sprouting. Always watch the bulbs to see if they are starting to get soft and if they are, use right away.

        Best Garlic Storage Temperatures

        To avoid mold, do not store garlic in plastic bags. Garlic needs to breathe. Garlic stores best long term when it is stored at between 35F and 55F and between 40% and 60% humidity. A normally air-conditioned house or basement seems to do pretty good.  Once the garlic is cured, do not allow air to blow on the bulbs.  It dehydrates the bulbs and they dry out.  Don't have a dehumidifier around the garlic either after the garlic has cured as it will also dry the bulbs and decrease storage life.      

        Storing garlic bulbs

        Refrigerating Garlic

        To get the longest storage life out of garlic, we do recommend putting the garlic bulbs in a brown paper bag and putting them in the crisper drawer in the refrigerator. When they come out of cold storage, they will want to sprouting thinking it is time to grow, so only take them out as needed.  After the garlic has been in cold temperatures, if you leave the garlic out in normal temperatures, it will sprout and deteriorate quickly.  That is why the garlic purchased from the stores does not last long because it has been kept cold and then sits out in the stores and then sprouts and goes bad quickly once you purchase them.  

        Sprouting

        Garlic sprouting is a natural part of the garlic’s life.  It will sprout after it has been through a cold period, and it starts to warm up and thinks it is time to grow.  That is why grocery store garlic sprouts, because not only is the garlic usually old since it is imported from other countries, but it was also put in cold storage to extend the life of the garlic.  We do not put any garlic in cold storage before it gets to our customers. Our garlic sees normal household temperatures until it gets to you.

        Spouts have 13% more nutrients than the garlic cloves, so remove the sprout and eat it before cooking to get the superior health benefits from the sprout. If the sprout is cooked, some say it turns bitter.

        PAKISTANI SEVIYAN – SWEET ROASTED VERMICELLI IN MILK, CARDAMOM WITH PISTACHIOS AND RAISINS

        Thursday, November 19, 2020


        The comforting memories of childhood come from those secret moments of glee, when you knew the forbidden fruit always tasted the sweetest. Whether it were the festival of Eid or just a whim on a hot Summer’s day – Seviyan is a dessert that I always craved, and was always told was meant to be eaten on special occasions, though my grandmother would always indulge me!

        A marriage of all the aromas, textures and colours that define a Pakistani sweet together with it’s cooling temperature – it was always a welcome treat on a hot Summer’s day.  I think of my aunt’s at the stove preparing Seviyan for an Eid dinner, my Nani making me a sweet to calm me if my parent’s were on holiday and my Dadi preparing it for my Dada (grandfather) to woo him even after 65 years of marriage (at the time), though she always made her family recipe of Qawami Seviyan which is linked here – There are many versions of Seviyan, but this is the quickest and easiest, using only South Asian roasted vermicelli, I wouldn’t try it with any other..

        To me Seviyan has always been a romantic dessert – one that celebrates the romance of  the land’s history, the warmth of Pakistani hospitality, the cool sea breeze of the coast of the Arabian Sea and the love we have for our Land of the Pure (the literal meaning of the word Pakistan). It highlights all the aromas used in our desserts, ones borrowed from our Mughal heritage, Irani influences and Muslim traditions – it most of all reminds me of lazy, carefree, safe days of my childhood and growing up in a country that to me will always be home. Every bite transports me to happy, endless Summers in Karachi and the safety of both my grandmother’s arms and the enveloping aromas of their kitchens, where I learnt my passion for food.

        Preparation time: 15-20 minutes

        Cooking time: 15 minutes

        Serves: 7-10 people


        Ingredients:

        Half a packet of Pakistani/Indian roasted vermicelli (found in Asian supermarkets http://www.natco-online.com/acatalog/info_R9200.html) – crush these into small pieces before adding to milk

        25 grams caster sugar

        100 grams of sweet condensed milk

        1 pinch of saffron, soaked in 1 tbsp hot boiling milk

        1 pint of whole milk / soya milk / almond milk

        A handful of chopped pistachios, almond, raisins

        4-5 cardamom pods, bruised open

        Ghee

        Decorate with silver leaf (optional)


        Method:

        1. Heat ghee in a saucepan on medium heat and add the cardamom. Once fragrant add the crushed vermicelli and keep stirring to avoid burning them.
        2. Once fragrant slowly add both the milks and keep stirring. Add sugar and stir and cook until the mixture becomes thick and vermicelli is cooked through.
        3. Pour in saffron and then place in a serving dish. Garnish with nuts and raisin – and silver leaf if available. Serve cold or hot.


        As dreams start finding reality, I am humbled to the beginnings of my knowledge and thankful for my un-satiated desire to learn. Food and it’s celebration was a gift I grew up with. A precious joy that was handed down to me by my two grandmothers and most importantly, my mother. All my best memories of childhood revolve around a dining table, walking into my home or my grandmother’s homes and being hit with the aromas of home cooked warmth, greeted with smiles and a heart full of love. Feeding me seemed to give them the greatest delight. The happiness they felt knowing I had eaten more than I could cope with always was the reason for my never saying no – nothing can compare to the joy in a Asian’s mother’s face when she sees a plate wiped clean with your last piece of chappati. My most endearing memories of my late grandmother’s was the excitement with which they created a meal – that their entire day would be meaningful from just that. My mother still cooks me  hearty soul satisfying meals with the joy reminiscent of my grandmothers…

        Though there is one aroma that transports me to a time of childhood glee and recklessness, a time of endless days and lazy afternoons – the smell of semolina fried gently in ghee and cardamom. One of the simplest desserts of Pakistan is Semolina Halva, and my Nani rejoiced in making this dish, I remember well that she would add  nuts in it – which at the time I abhorred, however with time and experience I have learnt to appreciate the earthiness and sweetness they add – I share my recipe for a Pakistani laddo (a round shaped sweet) – made with pistachios, semolina, coconut and Arabic gum – this edible gum is found in most Asian food stores and my mother always adds this, it is meant to give bones strength – based on a old Lucknowi recipe that my Dadi’s family had been making for centuries. I have now improvised this and added coconut, as the original recipe does not call for it. It is said that edible gum is strengthening and  gives strength to women after pregnancy, the ailing and children as well. But these can be enjoyed as an after dinner treat or even with tea..

        I dedicate this recipe  to my late grandmothers who instilled a burning passion for cooking Pakistani food that grows within me and most of all to my wonderful mother who has not only channelled my love for cooking but taught me all that there is to know about life, food and honouring your heritage. She is the one who has helped me find my way to a place where I have something to give back to others who celebrate the adoration of food and what joy it brings to life.  Thank you Mummy x

        Preparation time: 10 minutes
        Cooking time: 20 minutes
        Total time: 30 minutes
        Makes about 10 pieces, depending on size

        Ingredients:

        150 – 200 g semolina
        80 g  desiccated coconut,  keep a little aside for rolling
        115 g  caster sugar
        1 tbsp ghee
        1 tsp freshly ground cardamom
        3 tbsp of chopped pistachios
        1 tbsp chopped almonds
        1 tbsp Arabic gum – pre-fried in ghee and puffed up (optional)
        1 tbsp golden raisins
        ½ cup whole milk
        2 – 3 tbsp ghee

        Method:

        1. Heat a wok style pan and add ghee on medium heat. Add all the dry fruit and let them change colour slightly. . Add puffed gum at this point if using.
        2. Now add the coconut and then semolina, cook on very low heat stirring constantly and not letting the mixture burn and allow to cook evenly
        3. Add sugar and keep mixing the semolina. Add milk to bind and now switch off the heat.
        4. Add cardamom powder and mix well. Place in a flat dish and allow to cool for a few minutes.
        5. Once slightly cool, take a small amount of the semolina and make tiny ladoos, round balls the size of golf-balls. Place on a dish and allow to cool for 1-2 hours.
        6. These keep in the fridge for 1 week and outside in a covered container for 2-3 days – best eaten at room temperature.
        Silk rose in photos by Lotus Blu


        2017_04_03_ASDA_RAMADAN_16056


        Tip: You can replace wild garlic with finely chopped garlic cloves

        Serves: 3-4

        Ingredients:

        • 1 ½ tbsp. ghee or 1 tbsp. unsalted butter and 1 tbsp. vegetable oil
        • 1 tsp black cumin seeds or cumin seeds
        • ½ large red onion, chopped finely
        • 2 handfuls of baby spinach
        • 2 sprigs of fresh dill
        • 1 large handful of ramson/wild garlic
        • 200g basmati rice, rinsed and soaked in tap water for 1 hour

        To serve:

        • 100 g natural full fat yoghurt

        Method:

        1. Rinse and soak the basmati rice in water for about 1 hour maximum and drain.
        2. Heat a saucepan (lidded). Once hot add ghee (or butter and oil). When melted, add cumin. Allow it to pop and add the red onions.
        3. Chop the greens, (if using garlic instead of wild garlic leaves chop finely).
        4. When the onions are light brown from the edges add all the greens (or garlic with greens) and toss until wilted. Add the drained rice and stir through until all combined.
        5. Top with a little water (enough to lightly cover the rice, but not cover it totally). Place the lid on and turn the heat to low. Cook for 5-7 minutes, check if rice had absorbed the liquid, if still raw, add a few more splashes of water, cover and cook until done. Puff up the rice using a fork. There should be no liquid remaining.
        6. Serve with plain natural full fat yogurt.

        Eggs, The universal comfort food. Evoking memories of comfort, home and mother’s warmth. Eggs cooked any way, in any culture are reminiscent of these nurturing memories that take us to a safe place. Whether you are in Italy, Spain, France or the UK– every cuisine adds it flavour to make the experience a personal one, either steeped in heritage of ingredients, freshness of produce or aromas of a land.

         To me the aromas of my homeland Pakistan and my mother’s Sunday morning breakfast is encapsulated in the essence of Khagina. Eggs brought to life by the infusion of earthy cumin and garlic into ghee (clarified butter) with a quick whisk of the freshness of coriander and tomatoes and lastly a real Pakistani kick of green chills…The key to perfection is to not burn the garlic or cumin  – to gently release the right pungency to the oil before adding the eggs. Once the eggs are added, retain the freshness of raw ingredients.  Khagina is a Pakistani celebration of fast nutritious food, with an inexpensive injection of protein in the diet of a large family, yet keeping freshness and flavour alive together with seasonal produce.

        Ingredients:

        • 2 tsp ghee – or substitute with 1 tbsp butter and 1 tsp vegetable oil
        • 1 tsp cumin seeds
        • 1 garlic clove, finely chopped
        • 3 eggs
        • Salt to taste
        • 1 tbsp chopped coriander leaves
        • 6-7 cherry tomatoes, chopped
        • 2 green chillis, finely chopped
        • Freshly ground pepper

        Method:

        1. Whisk the eggs with tomatoes, coriander and green chillis

        2. In a frying pan, heat the ghee or butter and oil and once hot, add the cumin until it splutters.

        3. Next add the garlic and allow it to get lightly browned. Now add the egg mixture and scramble until done.

        4. Serve immediately with a freshly ground black pepper


        I could go on about my saviour, the simple daal – The ultimate non stodgy comfort food that I reach out to each time I feel blue or homesick. I look back at moments in my life where I sought out this humble bowl full of loving care and I don’t quite recall why I needed it, just that I felt better with the first mouthful. Possibly because nothing compares to the places this simple flavour and texture takes me. One reminiscent of home, safety and smiles of loved ones.

        My clearest most revisited memory would be the one of entering my Dadi’s  (paternal grandmother) home on Sundays. The edible experience began long before I walked into her kitchen. It was a sensory and sensual one from the moment I stepped through her main gate; the night bursting with the intoxicating pungent scent of fresh currypatta (curry leaves) abundant on the sole tree along her garden path, the waft of green spiciness of chillis and freshly cut lemony coriander.

        I’d enter the house and was hit by the air heavy with earthy smokiness of freshly cooked chapatti’sfrom the kitchen. Through the door of the kitchen I would be greeted by 5 aunts and a grandmother all effortlessly  creating a wholesome meal for the family table. There was bhindikorma, chapattis, basmati rice and daal – always daal. I would sample everything, spicy –  aromatic –  laden with layers of flavours of spice – which to me is the the true taste of Pakistani cooking alone ….

        However, I was always drawn to the plainly simple yellow daal, sitting there in a patili (stainless steel cooking pot), making no apologies for its’ sloppy demeanour  – Its plain comforting earthy essence was yet to come alive with a hot hit of bhagar with garlic, cumin and red chillis in ghee. Bringing it to life and transferring its shy yellowness to glistening pride. Speaking of flavour, grace, comfort and nurturing – knowing its place being one of a blank canvas of homeliness.

        The meal was ready to be served when the daal was ready – everyone was at the table ready to relish this  lavish meal even with the most simplest dishes. It was the love and dedication it was made with that made it rich. One freshness no table at my Dadi’s was without were fresh long green unforgivingly hot chills by the dozens. Consumed with each bite of food and no one was ever excused from trying them. All I remember well is that each time I would only eat green chilli with daal and chapattis!  An acquired taste to say the least, but one that I crave always – a true taste of of home and comfort for me will always be a daal, roti aur hari mirch ka navala ( a morsel of all daal, bread and green chillis).

        Enough to feed a family

        Takes 25 minutes to prepare and cook

        • 50 grams Masoor daal
        • 50 grams Maash daal (Urad daal)
        • 50 grams Moong daal
        • 1/2 tsp turmeric
        • 1 clove of garlic, sliced thinly
        • salt to taste

        For the tempering/bhagar:

        • 2 tsp ghee or vegetable oil mixed with 1 tsp butter
        • 1 tsp cumin
        • 1 clove of garlic, thinly sliced
        • 2-3 dried red chillis
        • 3-4 curry leaves, fresh (optional)

        Garnish with:

        • Chopped coriander
        • Chopped green chillis
        • A pinch of garam masala
        • A handful of fried crispy red onions

         Method:

        1. Mix all the daals together, wash them and drain. Heat enough water to cover the daals in a saucepan and add 1 sliced garlic, turmeric and mix well. Boil until daal is cooked though. Approximately 12 – 15 minutes or so on medium heat, keep stirring to avoid it sticking to the pan and add more water if it dries up quickly. Using the back of a spoon, mash up the daal after its cooked. Pour into a serving dish.

        2. Once cooked, add the salt to taste. In a small frying pan or tarka pan, heat the ghee or oil and butter. Once hot, add the cumin, allow to splutter. Next add the garlic and let it brown slightly, add the red chillis for a few seconds and lastly the curry leaves for just a second. Pour over the daal immediately. Garnish and eat hot with bread or rice as an accompaniment or by itself.