Showing posts with label Sauces. Show all posts

Gulkand - Rose Sugar Jam

Sunday, October 17, 2021

 How to make Gulkand? 

_____________________________

There are only 2 ingredients needed to make Gulkand. 

Rose petals and sugar. 

The quantity of rose petals and sugar is equal by weight so sugar helps preserve the rose petals along with their essential oils.

gulkand recipe

We need the heirloom (desi) variety of rose known as Damask rose. This variety has very soft delicate petals and a lingering fragrance. The flowers can be multi-whorled or single whorled depending on where they are growing, pruning pattern, sun exposure and climate.

In the states of Uttarakhand and lower Himalayas the Damask rose grows wild by the roadsides and comes in huge bunches. The rosehips from those roses are the best.

Deep pink variety of Damask rose is preferred over the light pink rose to make Gulkand or rose petal jam.

Once you have the roses, better get them from a chemical free source, I collected them over a week when my garden was benevolent a couple of years ago, just separate the petals and rinse them lightly under running water. Spread the petals over a muslin cloth in shade so the water evaporates.

The older method warrants crushing of rose petals in mortar and pestle slowly but I use a mixie blender whenever I have a good quantity of rose petals to preserve. It takes just a couple of seconds for a batch and the mixture doesn't get heated. Heating the mix would result in the loss of the aroma.

To make fresh gulkand from a couple of roses within a day I just crush them along with sugar, keep in a glass jar and expose to sun for a day. 

Here is how it looks when rose petals and sugar are crushed lightly in a mixie blender. You can use a food processor and even a chopper.

gulkand recipe
 
After crushing them together coarsely, just transfer to a sterile (clean and dry) glass jar with a tight fitting lid and keep indoors at room temperature, away from sun to preserve the colour.

The gulkand stays well for years but the colour gets darker as you can see from the pictures of freshly made gulkand above and the 2 year old batch in the picture with Gulkand phirni.

gulkand recipe

And don't worry about the high sugar content of gulkand. It is never used as a jam spread but always as a rose flavour to be added to desserts so the sugar gets balanced.

Damask roses

Damask roses traveled from Persia to Europe, the name of the rose comes from Damascus Syria. I am not sure how these roses came to India but now they are called as Indian desi gulab. It might have come to India via older trade routes as there has been a considerable exchange of such commodities between the middle east and India.

I will update this post if I get any information about how Damask roses came to India. Please share if you know anything about that.

Damask roses

Till then, make some Gulkand whenever you get a few Damask roses or desi gulab. You will be hooked to make this rose petal jam that doesn't need any cooking.

And the gulkand phirni will be a preferred dessert at home I must tell you. The real ingredients have the taste, the chemical essences just fool our senses and sometime kill them too. Please don't let that happen. 

Mula ko Thepe Achaar (Smashed radish pickle-salad)

Friday, October 15, 2021

Mula ko Thepe Achaar

Mula ko Achaar is very popular Nepali cuisine, and essential part of the Nepali food culture. There are various varieties, and ways to make the Mula ko Achaar, from freshly made salad, cooked pickle to fermented one. This Mula ko Thepe Achaar (smashed radish pickle-salad) is very simple to make… it’s simply smashing radish with some spices in Silauto (Mortar and Pestle). This is fresh and simple, and its flavor makes your mouth drool. You can eat this as starter or a side dish with Roti and Nepali Khana set (dal-bhaat-tarkari).

Fresh radish in market

Here is my version Mula ko Thepe Achaar.

Ingredients

1 medium size Radish
2 medim size Tomatoes (or better few cherry tomatoes)
1 small Onion
2 Green Chilies
½ tsp of Cumin seed
½  tsp  of Szechuan pepper (Timur)
A pinch of Turmeric powder
1 clove of Garlic
1 tbs of Roasted Mustard oil
Lemon/Lime
Salt

Method

Wash the radish properly with clean water. (Note: Do not peel of the skin- that’s where all the sharp pungent peppery flavors are, including crisp crunchy texture)

Cut the radish into large chunky wedges.

Radish cut into wedges

In a small pan, roast the cumin seed and Szechuan pepper until they start to release the aromatic smoke.

Transfer them into the mortar (or Silouto), add salt (according to your taste) and turmeric powder and grind them together using pestle. Add green chilies and garlic, and grind them.

Spices for Achaar (salt, roasted cumin seed and szechuan pepper, turmeric, chilies)

Put the radish wedges and smash them using pestle until they shreds as shown in the picture below. Cut the tomato into four wedges and slice the onion. Add tomato wedges and onion in the mortar and gently smash together.

Smashed radish wedges with spices

Squeeze half a lemon juice and add a tbs of roasted mustard oil. Mix them together using spoon and sprinkle some coriander leaves before serving.

Mula ko Thepe Achaar


 https://www.thegundruk.com/mula-ko-thepe-achaar-smashed-radish-pickle-salad/

Tomato Pickle with Radish Seeds and Spices

 This pickle made from uncooked tomato, radish seeds and spices is simply delicious. The hint of nutty flavor comes from roasted radish seeds, and uncooked tomatoes give fresh and crunchy texture to the pickle. Newari community is the only ethnic group I have found to use radish seeds in making pickle. My college friend introduced me to this pickle and provided the recipe. It’s very simple and easy to make.

tomato and radish seed pickle
Tomato-pickle-with-radish-seeds-and-spices-under-sunlight-for-fermentation
tomato pickle ingredients
Key ingredients required for making this pickle
tomato pickle mixture
Making of Tomato pickle

Ingredients:

½ kg Tomatoes
3 tbs Radish seeds
1 tbs Mustard seeds (optional)
4-5 Garlic cloves
½ thumb size Ginger
6-8 Green Chilies (or according to your preference)
1 tsp Fenugreek Seed
1 tbs Cumin and Coriander powder
½ tsp Turmeric powder
1 tbs Red Chili powder
4-5 tbs Vegetable Oil (preferably mustard oil)
Salt

Method

  1. Cut tomatoes, chilies, ginger and garlic cloves in small pieces, and transfer into a bowl.
  2. Roast radish seeds and mustard seed (optional) lightly in a pan with continuous stirring. As soon as they start to blister, transfer into mortar and pestle. Allow it cool and grind them coarsely. Mustard seed to gives mustardy pungent kick or flavor to the pickle.
  3. Heat 2-3 tbs of mustard oil and add fenugreek seeds. Turn off the heat when fenugreek seeds start to blister and add turmeric powder, red chili powder and cumin-coriander powder mix. Pour it over the diced tomatoes.
  4. Add around one tbs salt and mix them all together properly.
  5. Pour the mixture into clean jar. Tap or lightly shake the jar few times during the filling process. This will help in compacting the moisture and release air pockets in the jar. Do not fill the jar up to the neck. Leave some space as it boils and expands during the fermentation process.
  6. Pour about 2 tbs of mustard oil over the mixture and close the lid tightly.
  7. Leave it for around 5-6 days under the sunlight. Direct sunlight helps in fermentation and also prevents from getting mold. In 5-6 days, the pickle develops flavors and turns sour. It is usually eaten with daal-bhaat-tarkari and roti. It can last few weeks outside refrigerator and months inside the refrigerator.

Note: Use hot water to clean and sterile utensils and jars.

Lao Dips - Pepper Dip | Tomato | Mushroom

Monday, August 30, 2021


INGREDIENTS

  • 1 oz Thai chili peppers (~12)
  • 1 garlic clove
  • 1 tsp salt
  • 1 tsp sugar
  • 1 Tbsp lime juice
  • 2 Tbsp fish sauce (3 crab brand)
  • Chop cilantro and green onion

INSTRUCTIONS

1) Place the chili peppers, garlic clove, salt, and sugar in a mortar and pestle. Pound until the pepper become a nice paste. 

2) Scrap the pepper into a small bowl and add in lime juice, fish sauce, chopped cilantro and green onion. Mix well and serve with you favorite meat! 


NOTES

You can add more lime juice for more sourness. Freezing the chili pepper ahead of time will make it easier to pound into a finer paste. You can add as much cilantro and green onion as you want.


Pepper Dip #2: Nam Jim Jaew (แจ่ว)

INGREDIENTS

  • 2 Tbsp tamarind concentrate
  • 1/2 Tbsp palm sugar chopped finely*
  • 1 Tbsp fish sauce (3 crab brand)
  • 1 Tbsp lime juice
  • 1 tsp (or more) Thai chili flakes
  • 1 small shallot sliced
  • 1 Tbsp toasted rice powder
  • 1 Tbsp green onion chopped
  • 4 cilantro sprigs chopped

INSTRUCTIONS

1) Mix everything in a small bowl and taste to adjust. Serve with your favorite grilled meat. 

*finely chop the palm sugar so it's easier to dissolve. 

Add more chili flakes to make it spicier! 

NOTES

This dip is good the day of. If you make it a day ahead, the toasted rice powder will absorb most of the liquid and make the dip thick. It won't taste as good as the day of.


Tomato Pepper (Txiv lwg suav hov txob)

Hello tomato season!

Seasonal tomatoes have arrived and they are growing beautifully this year. I LOVE LOVE LOVE fresh seasonal tomatoes since they are so sweet and full of great flavor. Here are two simple tomato pepper we love to eat in my family. One roasted and one fresh. Super quick and tasty. These tomato pepper goes great with any kind of grilled meat. I love them with fried chicken, grill pork belly, fried fish, and steak. So give it a try and let me know what you like to put in your tomato pepper. Happy cooking!


INGREDIENTS

  • ---ROASTED TOMATO PEPPER---
  • 10 oz cherry tomatoes (roughly 1 1/2 cups)
  • 2 Thai chili pepper
  • 1 garlic clove
  • 2 shallots (chopped)
  • 2-3 green onions (chopped)
  • 1/4 cup chopped cilantro
  • 1/2 tsp salt
  • 1 Tbsp fish sauce (3 crabs brand if you have it)
  • ---FRESH TOMATO PEPPER---
  • 10 oz cherry tomato (roughly 1 1/2 cups) sliced in half
  • 2 Thai chili pepper minced
  • 2 green onion (chopped)
  • 2 Tbsp chopped cilantro (add more if you like)
  • 1 Tbsp fish sauce (3 crabs brand if you have it)
  • Pinch of salt

INSTRUCTIONS

ROASTED TOMATO PEPPER

1)  In a foil lined pan, place the cherry tomatoes, peeled and cut shallots, the smashed garlic, and 2 chili pepper on. Cook in the oven under broiled @ 500' F for about 12-15 minutes or until it is nicely roasted. Take out and let it slightly cool.

2) In a mortar and pestle, add in the roasted shallots, garlic, pepper, and 1/4 tsp of salt. Pound until the peppers are completely smashed up. Then add in the roasted tomatoes and pound away. Once it is nicely pounded, add in the chopped cilantro, green onions, and fish sauce. Mix well, taste and serve!

FRESH TOMATO PEPPER

1) In a bowl add in the sliced tomato, minced pepper, cilantro, green onions, fish sauce, and pinch of salt. Mix well, taste, and serve!

Mushroom Pepper: Hov Txob Nceb


Another pepper dip is here! We are going to be making mushroom pepper dip. One of my mom’s favorite pepper dip and one I grew up loving as a kid. Full of umami, spice, herbs, and simplicity. Great over rice and or alongside any grilled meat. Very simple to make and also very delicious. In Hmong Leeg, we call this Hov Txob Nceb: Hov Txob means pepper and Nceb means mushroom. I hope you all can give this pepper dip a try and let me know if you like it. Do let me know what you like to put in your mushroom pepper dip if you’ve made it before! Yeah yeah! Happy Cooking!

Main Ingredients

Mushroom: The classic white button mushroom. You can use other mushroom you desire. I suggest using ones that cooks well and release moisture.

INGREDIENTS

  • 1.5 lb chopped white button mushrooms
  • 2 shallot rough chopped (½-1 cup)
  • 2 garlic cloves
  • 4 green onion (white and green part separated)
  • 6 Thai chili pepper (more or less depends on you)
  • 1/2 cups chopped cilantro
  • 1/2 cups chopped green part of the green onion (from above)
  • ½ tsp salt
  • 2 tsp fish sauce

INSTRUCTIONS

  1. Rinse and cut the mushroom. For a finer dip, cut the shrooms smaller. For a chunkier dip, leave them a little bit bigger.

  2. Prep/cut the herbs.

  3. Line 2 baking sheets with foil and place the cut up shrooms on one and the shallots, pepper, garlic, and white part of the green onions in one. Bake under broil @ 450 for 8 minutes, stir and for another 8 minutes. After 16 minutes total, take out the tray that has the shallots. They should be nice and charred/cook. If you want it more charred, cook it longer. Continue cooking the shrooms for an additional 8 more minutes or so (total time of about 25-30 minutes). Cooking time may vary on your oven. Make sure to stir the shrooms every 8-12 minutes for even cooking. Once cooked, take it out of the oven & cool for 2-3 minutes.

  4. In a mortar n pestle, add in the roasted chili, shallots, garlic, and white parts of the green onion along with 1/2 tsp of salt. Pound until the peppers are smashed up. Then add in the mushrooms liquid and all. Pound. Then add in the chopped cilantro and green part of the green onion. Pound and then add in the fish sauce. Mix well. Taste to adjust and serve! Eat it white rice or as a side dish with meat etc.

Credit:  https://chawjcreations.com/

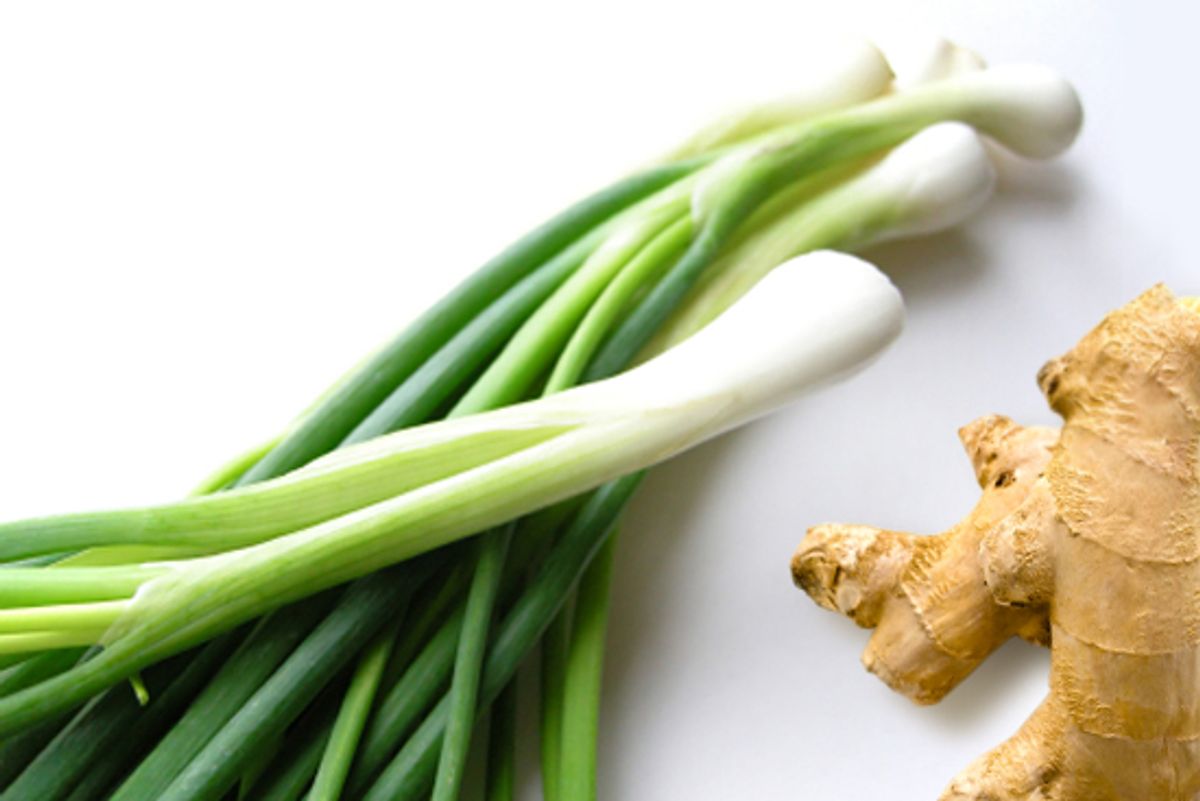
Ginger scallion sauce - makes literally anything tasty

Wednesday, March 10, 2021


Ginger scallion sauce makes literally anything tasty

Four ingredients, five minutes, and you'll have a jar of pure flavor firepower

main article image

There is a time in every eater's life when all you want is culinary firepower, when dainty ideas like "balance" and "nuance" just need to duck and cover while the big guns blast away.

For me, after youthful dalliances with Tabasco-on-everything and an aspiring-sophisticate olive-oil-on-everything phase, I turn now most often back to the all-purpose sauce of my southern Chinese people: ginger scallion sauce, the absolute soul of those two ingredients.

When I was in college, my mother used to send me care packages of the stuff, the oil winding its way through the threads of jar lids, making the cardboard boxes see-through. (This was before we had a Department of Homeland Security to get freaked out about such things.) But those boxes and all the greasy fingerprints they made me leave on the doors, walls and light switches were filled with the intense happiness of this promise: no food, not even a bowl of white rice, was too humble to be transformed into an utterly delicious meal with a spoonful of ginger scallion sauce. Hell, forget food. I dripped so much of it on the couch that Sunday afternoons I'd watch football, catch a whiff from the armrest, and get hungry. More than once, I looked at that armrest with improper and unsanitary thoughts. Believe me.

I admit this mash doesn't look like much, just some minced up something-or-other sitting in an oily pool. But its flavors are explosive, the ginger and the scallion locked up in there like Boom and Bang, the oil carrying them through the bite beginning to end. The It-Chef David Chang features a version of it in his Momofuku restaurants (he, too, says in his cookbook, "If you have ginger scallion sauce in the fridge, you will never go hungry"). And while he can obviously cook the hell out of me, I'm going to tell you that my version, below, is better.

To make it, you can just mix the ingredients together, like Chang does, and let their flavors come out over time. But the method I use is hotter than that -- you get the oil ripping and pour it on the aromatics; the brief but super-intense heat tames their sharp edges and releases their sweetness to the sauce.

Most traditionally, Chinese barbecue joints use this condiment to give intrigue to plain poached chicken. It's a beautiful combination, hitting you upfront with all kinds of wicked flavor then letting the chicken's subtler charms shine through as you chew. But it also works as a dip or slathered onto anything that can use a fresh, salty, oniony, bracing kick. Like, as I said, rice or boiled noodles or bread or sautéed shrimp or scrambled eggs. Mmmm ... scrambled eggs. I don't really recommend upholstery, but you know, I wouldn't judge.

Ginger scallion sauce
Makes 1 cup; a little goes a long way
Active time: 5 minutes

Ingredients

  • 1 ounce ginger, peeled and cut into ½-inch chunks
  • 1 bunch (about 4 ounces) whole scallions, cut into 1-inch lengths
  • ½ cup oil, preferably peanut or corn (Avoid olive oil and definitely no canola, which, when heated like this, smells like a fish. And not in a good way.)
  • Salt

Directions

  1. Whirl the ginger in a food processor until it's finely minced, but not puréed (meaning stop before it gets liquidy and pasty). Put it in a wide, tall, heatproof bowl, several times bigger than you think you need. For real. The bowl matters. Use a cooking pot if you have to, because when that oil gets in there, the sizzle is going to be serious business.
  2. Mince the scallions in the food processor until they're about the same size as the ginger. Add it to the ginger.
  3. Salt the ginger and scallion like they called your mother a bad name and stir it well. Taste it. It won't taste good because that much raw ginger and scallion doesn't really taste good, but pay attention to the saltiness. You want it to be just a little too salty to be pleasant, because you have to account for all the oil you're about to add.
  4. Heat the oil in a pan until you just start seeing wisps of smoke, and pour it into the ginger scallion mixture. It's going to sizzle and bubble like a science-fair volcano, and it's going to smell awesome. Don't stick your face in it. You wouldn't stick your face in lava, would you? Give it a light stir with a heatproof spoon.
  5. Let cool to room temperature. Keep it in the fridge, for whenever you want to be one spoonful away from deliciousness.

MOMOFUKU'S RECIPE

YIELD - 
Makes about 3 cups

INGREDIENTS

    • 2 1/2 cups thinly sliced scallions (greens and whites; from 1 to 2 large bunches)
    • 1/2 cup finely minced peeled fresh ginger
    • 1/4 cup grapeseed or other neutral oil
    • 1 1/2 teaspoons usukuchi (light soy sauce)
    • 3/4 teaspoon sherry vinegar
    • 3/4 teaspoon kosher salt, or more to taste

PREPARATION

    1. Mix together the scallions, ginger, oil, soy, vinegar, and salt in a bowl. Taste and check for salt, adding more if needed. Though it's best after 15 or 20 minutes of sitting, ginger scallion sauce is good from the minute it's stirred together up to a day or two in the fridge. Use as directed, or apply as needed.

Shredded Daikon Salad


This salad is palate-cleansing and refreshing. A little spicy, a little tart—and you can prep it in advance. The thinner you slice the daikon, the better it will absorb the flavor of the dressing. This recipe is from Taiwanese-American cook Lisa Cheng Smith’s spectacular Lunar New Year feast. Find the rest of her menu here.

Ingredients

8 REGULAR OR 16 SMALL SERVINGS

1

large daikon (about 1 lb.), peeled, thinly sliced into 3"-long matchsticks

¾

tsp. kosher salt, divided

1

red finger or Fresno chile, seeds removed, finely chopped

2

garlic cloves, finely chopped

2

Tbsp. toasted sesame oil

2

Tbsp. unseasoned rice vinegar

1

Tbsp. granulated sugar

½–1

tsp. store-bought or homemade chile crisp (optional)

Toasted white and/or black sesame seeds (for serving)

Preparation

Step 1

Toss daikon and ½ tsp. salt in a medium bowl; let sit 30 minutes. Transfer to a dish towel and squeeze out excess moisture.

Step 2

Meanwhile, whisk chile, garlic, oil, vinegar, sugar, and remaining ¼ tsp. salt in a large bowl and let sit 30 minutes.

Step 3

Add daikon to bowl and massage dressing into daikon. Let sit at least 30 minutes and up to 6 hours (cover and chill if holding longer than 1 hour).

Step 4

To serve, stir in desired amount of chile crisp if using and top with sesame seeds.

Green seasoning paste that’s so unique to Caribbean cuisine.

Saturday, February 20, 2021

 The one key ingredient when it comes to cooking any meat or fish dish in the Caribbean, is the green seasoning mix that’s used in the marinating process. Before we go on I’d like to mention a couple things. This recipe usually calls for 2 key ingredients “shado beni” and “Spanish thyme” (aka podina), both of which I can’t get readily get here in Canada, unless I source out a Thai or Caribbean specialty store. 

For the “shado beni” I’ve substituted in cilantro, which is somewhat similar but less pungent and I’ve left out the Spanish thyme. 

If you’re based in the Caribbean or can get those 2 ingredients, please use with caution since they can easily overpower the green seasoning with it’s strong flavors. I also couldn’t get the pimento peppers, so I opted for 1 banana pepper, but you can also use a Cubanelle

There are several variations of this seasoning mix, but this is one that I’ve tested and perfected over the years.

You’ll need…

1 bundle of Cilantro (about 1-2 cups)
1 stalk of celery (include leaves if you have it)
1 head or garlic (about 11 cloves)
4 green onions (scallions)
1 bunch of fresh thyme (about 3/4 cup)
1/4 cup of water
pinch of salt (optional)
2-3 shallots (optional)
2 pimento peppers (1 banana pepper or 1 Cubanelle)

Peel, trim and wash the ingredients and let drain.

caribbean-green-seasoning

Then rough-cut into smaller pieces so it’s easier to manage and work in the blender or food processor.

Personally I like to liquify my blend to the consistency of pesto or even a bit more liquid. However you have the choice at this point to make a bit more chunky-like if you wish.

After a few pulse actions you’ll find that everything blends together quite easily. Here’s a picture of the finished green seasoning :

green-seasoning-caribbean

Storage Tips!

From this batch I have a plastic container that I pour half into and keep in the fridge for everyday use, the other half I pour into a freezer zip lock bag and freeze until I get through the batch in the fridge. Since you probably won’t be using the seasoning as much as I do, I suggest you divide it into 3-4 portions, keeping 1 in the fridge (can last for 2-3 months) and freeze the rest.

You can also get a couple ice cube trays from the dollar store and fill each ice cube area 1/4 up with the seasoning mix and then freeze. Then when it’s frozen, you can dump the cubes into a freezer bag and place back in the freezer. Now whenever you’re cooking, all you have to do is grab a cube and use.

You’ll notice that after time the once brilliant green color will go darker, don;t be alarmed. That’s natural!


https://caribbeanpot.com/