Gourmet’s Best Gingerbread Cookies

Monday, December 12, 2022


  • Active Time

    50 minutes (not including decorating)

  • Total Time

    2 hours 15 minutes

Is there anything more comforting at the holidays than curling up by the fire with a gingerbread cookie and a warm cup of tea? (Laughing with family and friends around a plate of decorated sugar cookies runs a close second.) Whether you want to make gingerbread people, snowflakes, candy canes, ornaments—or even skeletons for Halloween—this Gourmet classic should be your go-to.

For this old-fashioned gingerbread cookie recipe, you’ll boil the spices with molasses and brown sugar to bloom their flavor. Then you’ll make the cookie dough right in the saucepan by adding in baking soda, cold butter (to bring down the temperature of the mixture), an egg, and the dry ingredients. There’s no baking powder here, which means your gingerbread men will keep their shape. If your dough feels too soft to work with easily, you can refrigerate it for 30 minutes to an hour; alternatively, if you want to make the cookie dough ahead of time, refrigerate it up to three days ahead and let it sit out at room temperature for 20 to 30 minutes to soften before rolling.

The cook time on these cutout cookies will vary depending on the size cutters you use, so keep a close eye on them. To mitigate burning, line your cookie sheets with parchment paper.

The decorating icing in this recipe is optional, but it’s a great upgrade from plain powdered sugar glaze. It’s a variation of royal icing that incorporates lemon juice, vanilla extract, and powdered egg whites, the last of which helps to stabilize the icing and gives it a polished, matte appearance when dry.

Editor’s note: This recipe makes a soft gingerbread cookie with a slightly crispy exterior. For a cookie with more crunch, look to these gingersnaps. Or, if you love chewy gingerbread, consider making these spiced brownies. Is a gingerbread house more your style? We dare you to try your hand at this cardamom-spiced Mid-Century masterpiece.

Ingredients

Makes about 4 dozen cookies

Gingerbread cookies:

⅔ cup molasses (not robust)
⅔ cup packed dark brown sugar
1 Tbsp. ground ginger
1½ tsp. ground cinnamon
½ tsp. ground allspice
½ tsp. ground cloves
2 tsp. baking soda
2 sticks (1 cup) unsalted butter, cut into 16 pieces
1 large egg, lightly beaten
3¾ to 4 cups all-purpose flour
½ tsp. kosher salt

Decorating icing and assembly:

1 (1 lb.) box powdered sugar
4 tsp. powdered egg whites (not reconstituted)
1 Tbsp. fresh lemon juice
1 tsp. vanilla extract
Gel food coloring (optional)
Sprinkles, dragées, and sanding sugar, for decorating
Special Equipment: Rolling pin; assorted 2- to 3-inch cookie cutters (in shapes such as people, snowflakes, candy canes, etc.); a metal offset spatula; a pastry bag fitted with ⅛- to ¼-inch plain tip (optional)
  1. Gingerbread cookies:

    Step 1

    Bring molasses, brown sugar, and spices to a boil in a 4- to 5-quart heavy saucepan over moderate heat, stirring occasionally, and remove from heat. Stir in baking soda (mixture will foam up), then stir in butter 3 to 4 pieces at a time, letting each addition melt before adding next, until all butter is melted. Add egg and stir until combined, then stir in 3¾ cups flour and salt.

    Step 2

    Preheat oven to 325°F.

    Step 3

    Transfer dough to a lightly floured surface and knead, dusting with as much of remaining ¼ cup flour as needed to prevent sticking, until soft and easy to handle, 30 seconds to 1 minute. Divide dough in half, then wrap one half in plastic wrap and keep at room temperature.

    Step 4

    Roll out remaining dough into a 14-inch round (⅛-inch thick) on a lightly floured surface. Cut out as many cookies as possible with cutters and carefully transfer with offset spatula to 2 buttered large baking sheets, arranging them about 1 inch apart.

    Step 5

    Bake cookies in upper and lower thirds of oven, switching position of sheets halfway through baking, until edges are slightly darker, 10 to 12 minutes total (watch carefully toward end of baking; cookies can burn easily). Transfer cookies to wire racks to cool completely. Make more cookies with remaining dough and scraps (reroll once).

  2. Decorating icing and assembly:

    Step 6

    Beat together the powdered sugar, powdered egg whites, lemon juice, vanilla extract, and ⅓ cup water in a large bowl with an electric mixer at moderate speed until just combined, about 1 minute. Increase speed to high and beat icing, scraping down side of bowl occasionally, until it holds stiff peaks, about 3 minutes in a standing mixer or 4 to 5 minutes with a handheld.

    Note: If you plan to spread (rather than pipe) icing on cookies, stir in more water, 1 teaspoon at a time, to thin to desired consistency.

    Step 7

    If using food coloring, transfer ¼ cup icing to a small bowl for each color and tint to desired shade. Spoon icing into a pastry bag (if using), pressing out excess air, and snip a ⅛-inch opening in corner of bag. Twisting bag firmly just above icing, decoratively pipe icing onto cookies. Decorate with sprinkles, sanding sugar, and dragées, if using. Let icing dry completely (about 1 hour) before storing cookies. 

    Do ahead: Gingerbread cookies keep in an airtight container at room temperature 3 weeks.

    Editor's note: This recipe was originally printed in the December 2002 issue of ‘Gourmet’ as Gingerbread Snowflakes and first appeared online in August 2004. Head this way for more of our best Christmas cookies 

Turkey Potpie on Iron Skillet

Thursday, December 1, 2022

Ingredients:

  • Leftover Turkey Sliced
  • 1 tablespoon peanut or olive oil
  • 1 Red Onion Sliced
  • One Cup Chopped Celery
  • One Cup Carrots Sliced
  • One Cup Peas
  • One tin of Crème of Mushroom
  • Salt & Ground Pepper

Crust

1 crust from 1 box (14.1 oz) refrigerated Pillsbury™ Pie Crusts (2 Count), softened as directed on box

Steps

  1. Heat oven to 425°F. 
  2. In 10-inch nonstick ovenproof skillet, heat oil over medium-high heat until hot. 
  3. Add cur onions, celery, carrots. Sauté the vegetables until carrots are bit soft but still have a bite.  Add bit of salt (not too much as the creme' of mushroom will also add salt to the mixture). Add peas. Cook a bit more. 
  4. Stir in chopped turkey. Mix well. Cook for few more minutes. 
  5. Add Creme' of mushroom couple of tablespoons at a time instead of dumping the whole can. Just so that you can  control the liquid quantity.
  6. Cook until mixture just begins to boil, about 2 minutes. Remove from heat.
  7. Transfer the content to the iron skillet. 
  8. Unroll crust and place over hot turkey  mixture in skillet. Press and flute to skillet. Using sharp knife, cut six 2-inch slits in top of crust.

  9. Bake for 20 minutes and then additional 10 minutes until  crust is deep golden brown and filling is bubbly. If necessary, cover edges of crust during last 10 minutes of baking to prevent excessive browning
Serve potpie with a side of Cranberry Sauce. 

---------------------------------------------------

Original Recipe
  • Alternate replacement fillings
  • 1 package (12 oz) frozen broccoli, cauliflower and carrots
  • 2 packages (6 oz each) refrigerated grilled chicken breast strips, cut into 1-inch pieces
  • 1 can (10 3/4 oz) cream of chicken with herbs soup
  • 1/2 cup frozen sweet peas
  • 1/4 cup water 
  • 1/2 teaspoon freshly ground pepper

Crust

1 crust from 1 box (14.1 oz) refrigerated Pillsbury™ Pie Crusts (2 Count), softened as directed on box

Steps

  1. Heat oven to 425°F. In 10-inch nonstick ovenproof skillet, heat oil over medium-high heat until hot. Add frozen broccoli, cauliflower and carrots. Cook about 5 minutes, stirring frequently, just until thawed. Stir in remaining filling ingredients. Cook until mixture just begins to boil, about 2 minutes. Remove from heat.

  2. Unroll crust and place over hot chicken mixture in skillet. Press and flute to skillet. Using sharp knife, cut six 2-inch slits in top of crust.

  3. Bake 25 to 30 minutes or until crust is deep golden brown and filling is bubbly. If necessary, cover edges of crust during last 10 minutes of baking to prevent excessive browning.

Authentic Mapo Tofu (麻婆豆腐)

Wednesday, October 19, 2022

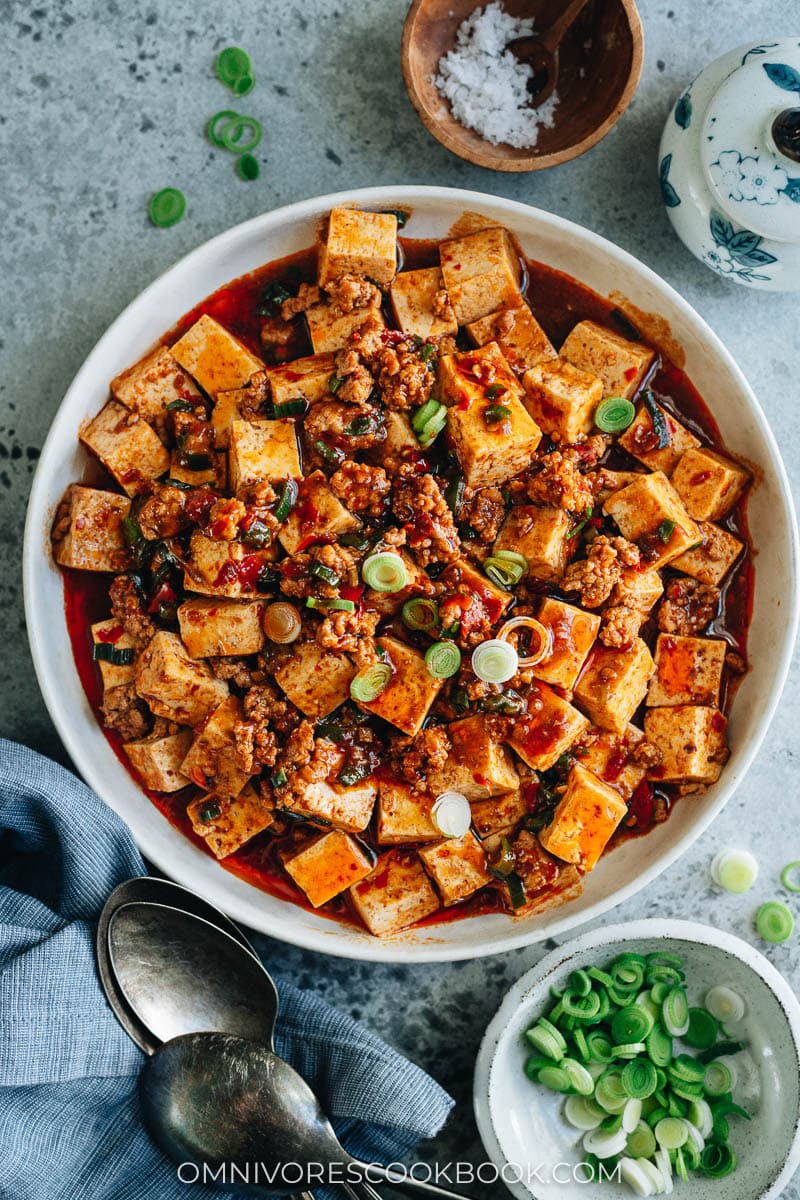
An easy mapo tofu recipe that creates the authentic taste of China that features soft tofu cooked in a rich, spicy, and savory sauce that is full of aroma. Serve it over steamed rice for a quick, delicious and healthy weekday dinner!
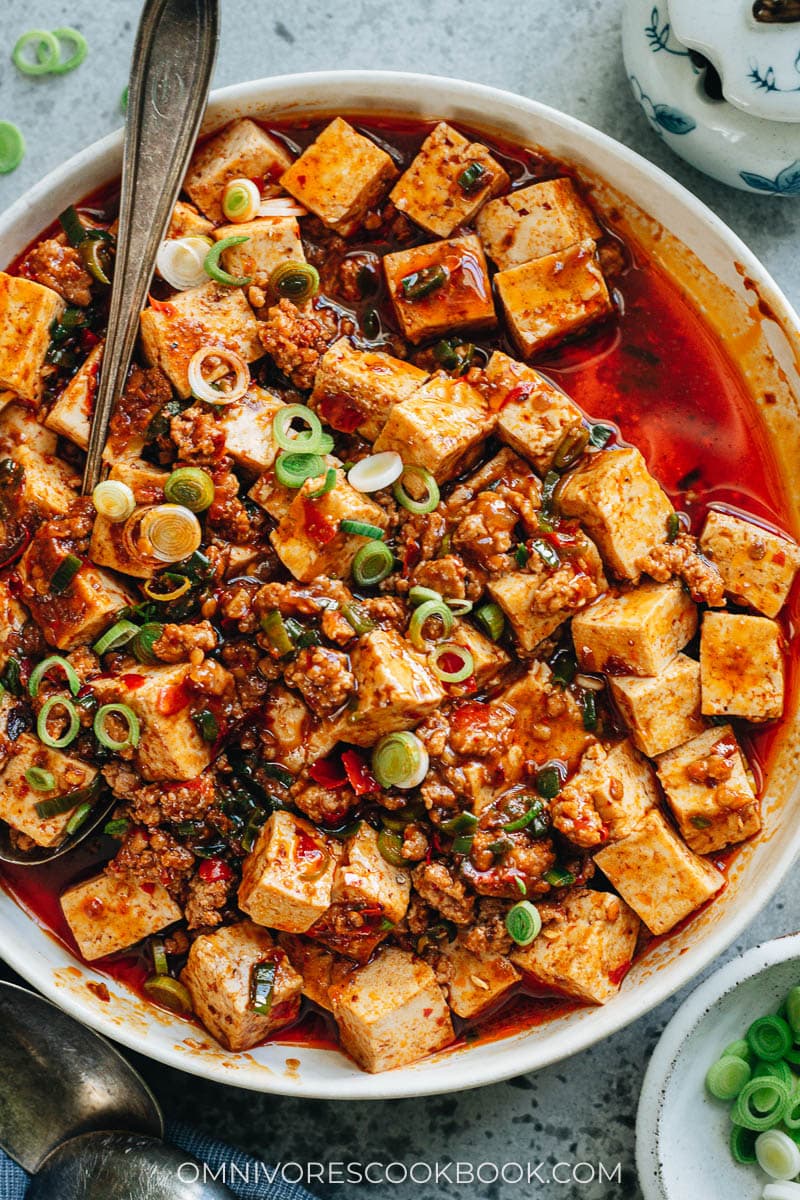
Mapo tofu close up

Mapo tofu (麻婆豆腐, ma po dou fu) is one of the most popular dishes from Sichuan cuisine. The tofu pieces are braised in a rich spicy, and savory sauce along with fresh garlic and scallions, with a small amount of ground pork to enhance the flavor. The dish is so appetizing and it goes perfectly with steamed rice.

Cooking mapo tofu is quite easy but you do need a few special ingredients to get the authentic flavor. I’m sharing my favorite mapo tofu recipe below. It creates the very authentic taste that you’d get at a restaurant in China. However, based on this recipe, you can easily tweak the dish according to your preferences.

Key ingredients for Mapo Tofu

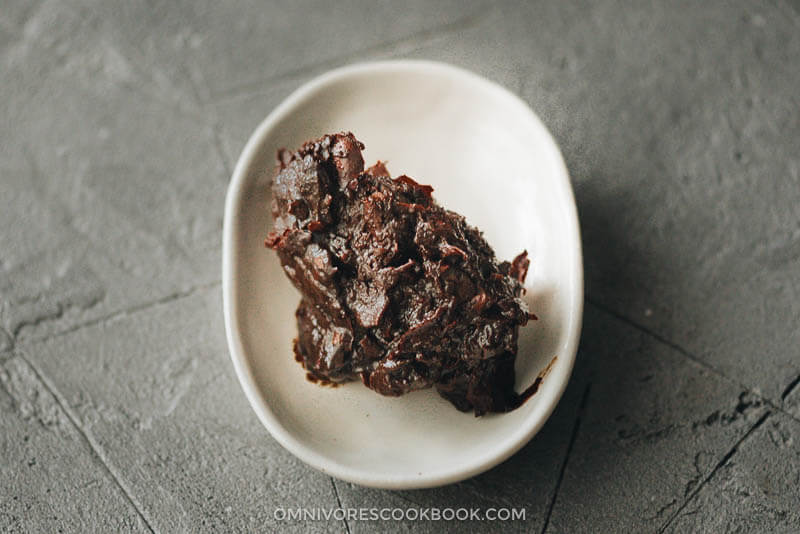
Doubanjiang

Doubanjiang (豆瓣酱), also known as spicy fermented bean paste or broad bean sauce, is the most important ingredient in mapo tofu. And it has a strong fermented savory, salty and spicy taste. Try to find “Pixian Broad Bean Paste” at your Asian market. Pixian is a small county in Sichuan province that produces the best broad bean paste. If you’re using this brand, you’re already halfway there. You can also purchase this brand on Amazon here.

NOTE: Depending on the brand of Doubanjiang you use, the salt and spiciness level can vary a lot. This dish is designed to be served with rice, so it’s on the salty side. If you want to make your dish less salty and spicy, reduce the amount of Doubanjiang (to 2 tablespoons).

Douanjiang

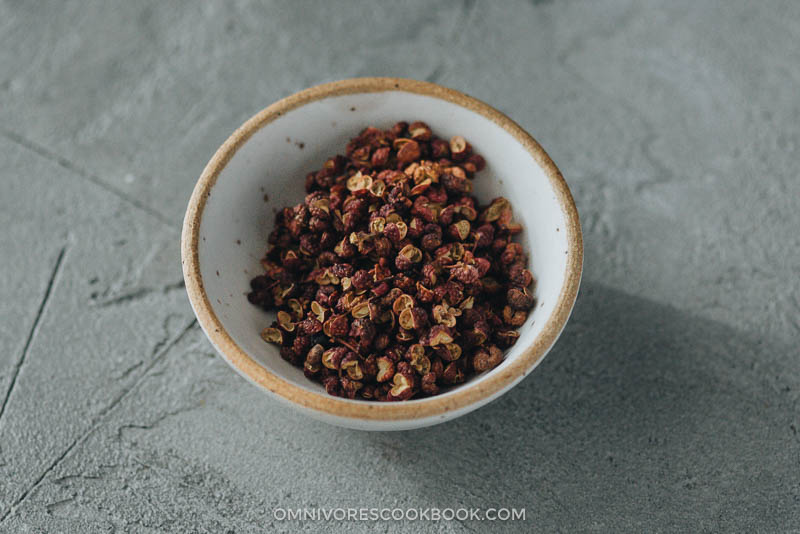
Sichuan peppercorns

Sichuan peppercorn (花椒, hua jiao) is another main ingredient in any Sichuan dishes. It has a citrusy taste with a numbing tingling sensation when you chew on it. It’s a secret to add aroma to your dish that no other ingredient can replace. You can purchase Sichuan peppercorns at Asian grocery stores, but I highly recommend these premium fresh ones from The Mala Market.

Sichuan peppercorns

Homemade chili oil

The other important ingredient is chili oil (辣椒油). Although you can purchase bottled chili oil at the grocery store, I highly recommend you make it at home. Freshly cooked chili oil tastes much better than store-bought and is free of additives. You only need a few minutes to cook it and it is really easy. You can find an easy chili oil recipe here. And if you prefer to purchase it instead of making your own, you can also find it on Amazon.

PS. You will usually cook more chili oil than you’re able to use in one meal. You can store the extra oil in an airtight container in the fridge for 6 months up to a year. You can use the chili oil in various dishes, including bang bang chicken, dan dan noodles, Sichuan spicy wonton in red oil, and Fu Qi Fei Pian (Sliced beef in hot sauce). You can also add it into a dipping sauce for potstickers, or add it to wonton soup to enhance the flavor, or even put it on oatmeal!

It might look like you need so many specialty ingredients for this one dish. But trust me, if you love Sichuan food, you’ll be using them again and again. 

How to cook mapo tofu

Once you gather the ingredients, making mapo tofu is a super easy process.

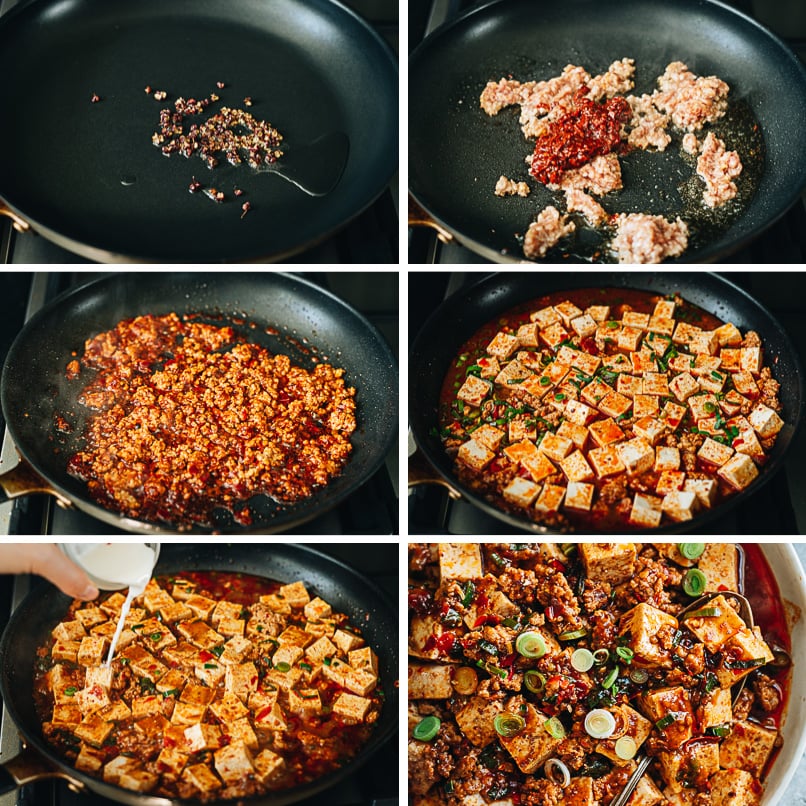
  1. Fry the Sichuan peppercorns in the oil to infuse the aroma
  2. Cook the ground pork with doubanjiang
  3. Once the pork is cooked, add the green onions and stir a few times
  4. Add the broth and braise with the cover on
  5. Drizzle in the cornstarch slurry to thicken the sauce

That’s it! I think this is one of the easiest Sichuan recipes and the result is super rewarding 🙂

How to make mapo tofu step-by-step
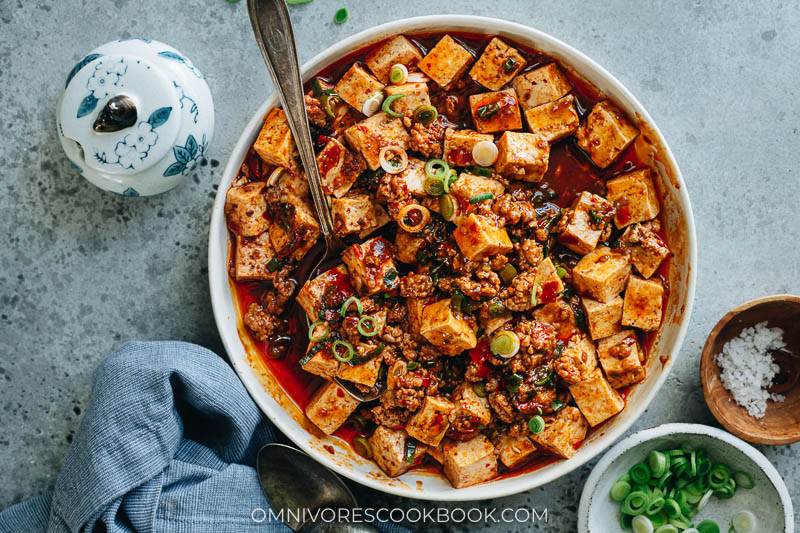
Homemade mapo tofu

Frequently asked questions

What type of tofu to use for mapo tofu

There is no correct answer to this, and you should choose what works best for you.

Some Chinese restaurants, including many in China, prefer to use soft or silken tofu to make this dish. It creates a very silky tofu texture that melts in your mouth. This method does require some experience in handling tofu, so you won’t break apart the very delicate silken tofu while cutting and cooking. 

On the other hand, you can also use extra firm, firm or medium tofu for this dish. These types of tofu are much easier to handle. Plus, once you braise it in the rich spicy sauce, it absorbs a lot of flavor and tastes great.

Do I need a wok to cook mapo tofu?

Not at all! I found it’s easiest to cook mapo tofu in a nonstick pan. The tofu will sit flat in the broth and absorb all the flavor. Not to mention it won’t stick to the pan easily or fall apart when you stir it. 

Can you recommend a gluten-free doubanjiang?

Doubanjiang usually contains fermented wheat, which is not gluten-free. Unfortunately I hadn’t found a great tasting gluten-free doubanjiang at the time of writing this post. 

There is a Japanese brand doubanjiang that’s gluten-free and I see it quite often at Asian markets and on Amazon. Compared to the Chinese brand, this one is quite salty and has less fermented taste. If you decide to use this one for your mapo tofu, you should reduce the amount (to 2 tablespoons) so your dish won’t end up too spicy and salty.

How to make mapo tofu vegetarian or vegan?

I have a vegan mapo tofu here that tastes super flavorful and great! 

Authentic Mapo Tofu (麻婆豆腐)

How to serve mapo tofu

I love cooking mapo tofu for a quick lunch or dinner and serving it over steamed rice. Sometimes I double the meat and sauce, so it will be enough to serve two people as a one-dish meal. I also like to add a handful of greens (spinach, garlic chives, or other tender greens such as chopped up baby bok choy) at the end of braising before adding the cornstarch, to create a more nutritious and balanced meal. Sometimes I also replace the ground pork (used in the authentic version) with ground turkey to cut calories.

For special diets, you can make it less spicy and skip the rice so it will be paleo-friendly. You can also make it into a vegan dish by replacing the meat with mushrooms.

Yes, mapo tofu is such a versatile dish!


Mala Spice Market - https://themalamarket.com/collections/all/products/3-year-aged-pixian-chili-bean-paste-doubanjiang


Published: 04/30/2015Updated: 06/21/2020Author:

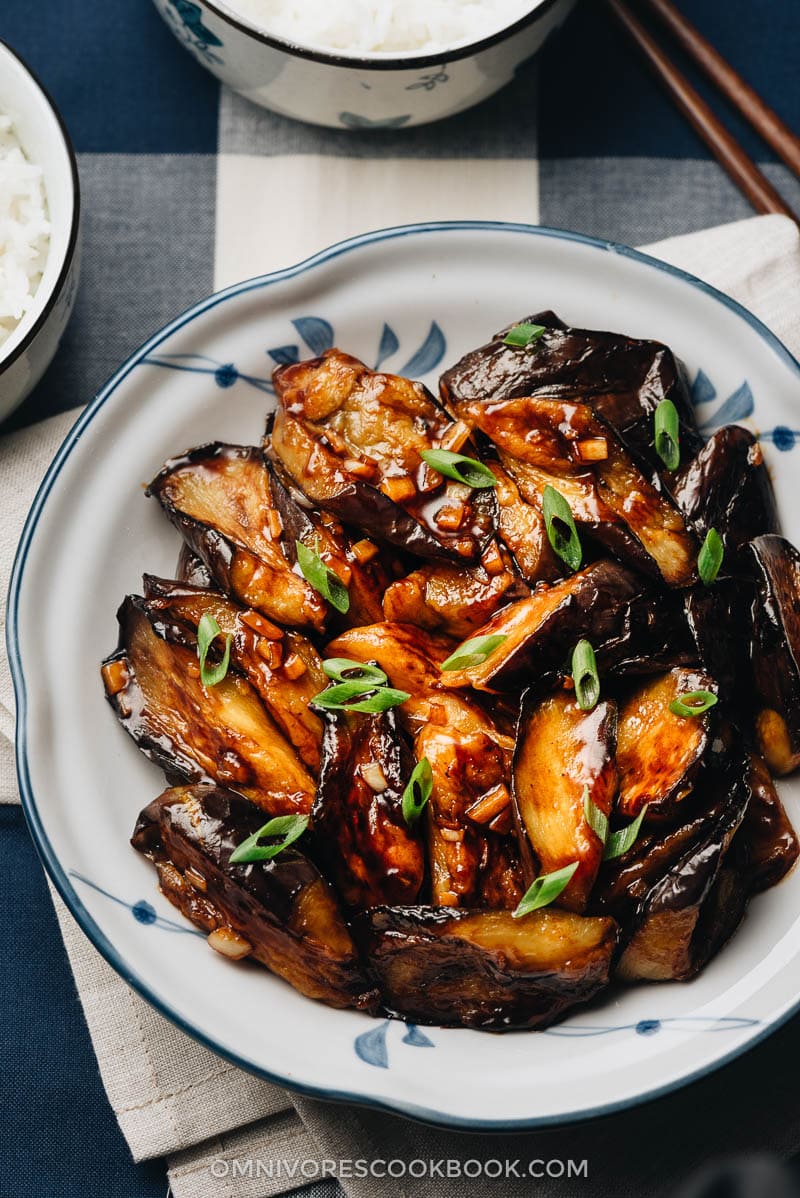
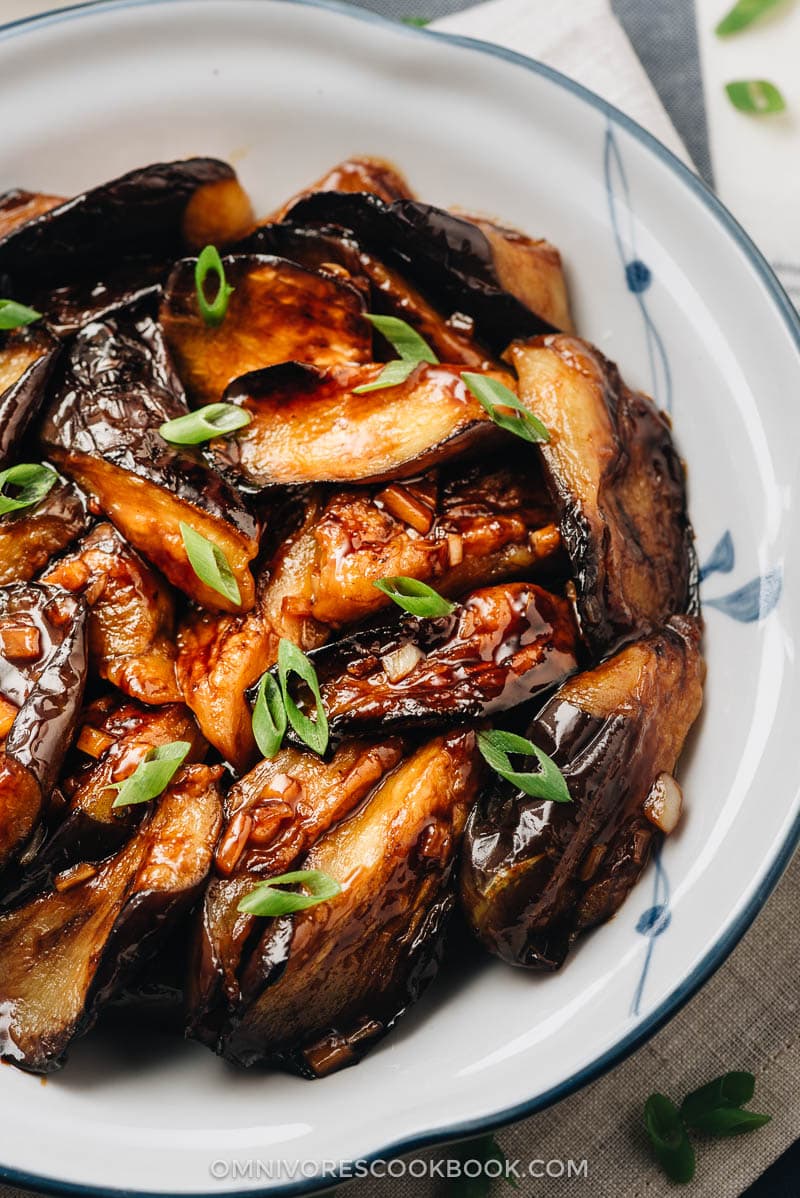
The eggplant is grilled until crispy and smoky, and then cooked in a rich savory garlic sauce. This vegan dish is very satisfying, both as a side or a main dish served over rice or noodles. {Gluten-Free Adaptable}

Chinese eggplant with garlic sauce

Eggplant is a very tricky vegetable to cook. If you don’t season it properly, it will taste bitter or extremely plain. If you use too little oil, the texture will be mushy and create an awful mouthfeel. If you use too much oil, the eggplant might turn soggy and greasy.

This recipe offers the simplest way to cook a great eggplant dish without using too much oil, and avoids soggy and plain eggplant with the minimum needed cooking time.

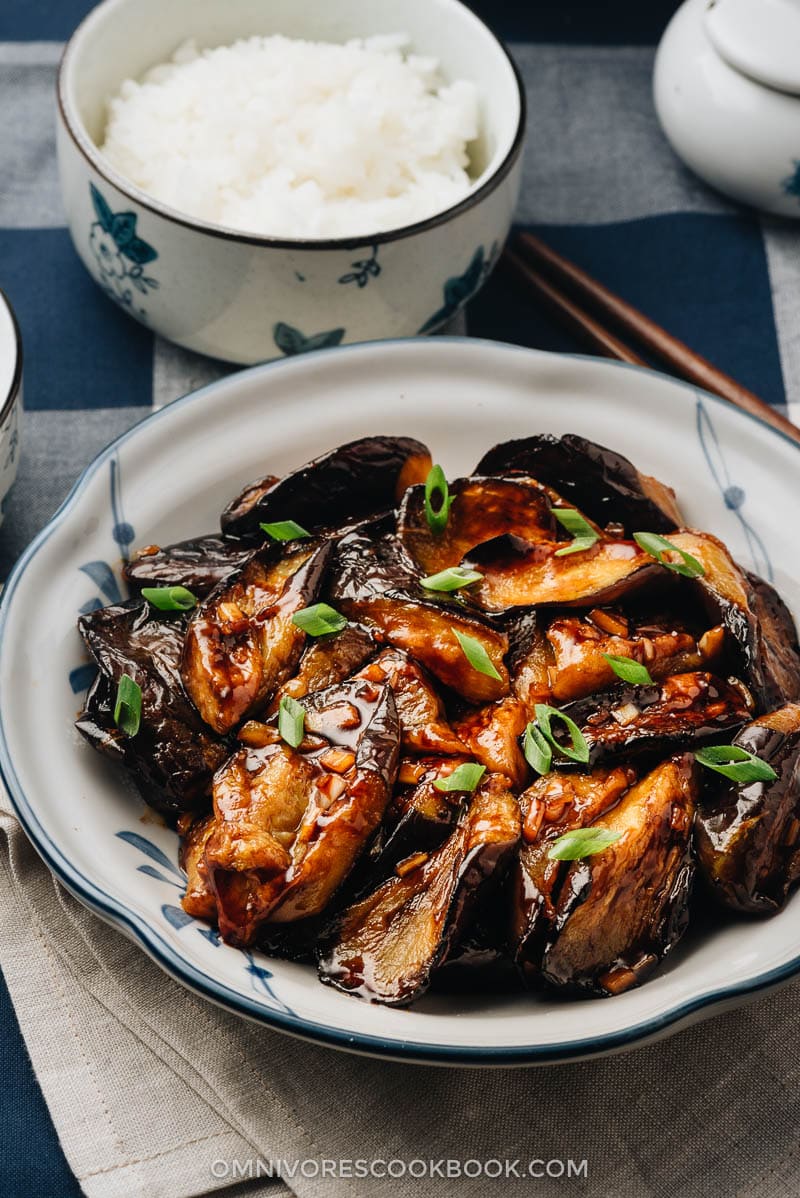
Homemade Chinese eggplant with garlic sauce

How to make the perfect eggplant dish

The secret to getting perfect Chinese style eggplant involves two things.

  1. You have to prepare the eggplant properly before cooking in order to get the right texture.
  2. You need to make a sauce that is flavorful enough.

To prepare the eggplant, there are two ways to do it.

Before introducing the first method, I want to thank my friend Steve S. He taught me this method quite a long time ago, to prevent the eggplant from absorbing oil.

The method is:

  1. Spread the sliced eggplant on a towel.
  2. Sprinkle Kosher salt on both surfaces of the sliced eggplant.
  3. Allow to rest for 45-60 minutes.
  4. Pat each surface dry.
  5. Do not rinse the eggplant.

The second way is:

  1. Place the eggplant in a large bowl and add water to cover.
  2. Add 1/4 teaspoon salt, mix well.
  3. Place a pot lid on top to keep the eggplant under water for 15 minutes.
  4. Drain and pat dry

The second method requires a bit more effort, but it saves a bit of time. Both ways yield great results.

Chinese eggplant with garlic sauce close up

Once you’ve finished either of the methods above, there is one more step – after the eggplant is completely dry, sprinkle cornstarch over it and mix by hand, until the eggplant is evenly coated with a thin layer of cornstarch.

Using this method, you can create crispy and nicely charred eggplant on the stovetop in 10 minutes. No need to turn on the oven to get the smoky flavor!

Creating a good sauce is really easy. Just mix everything together and pour it over the eggplant at the end of cooking.

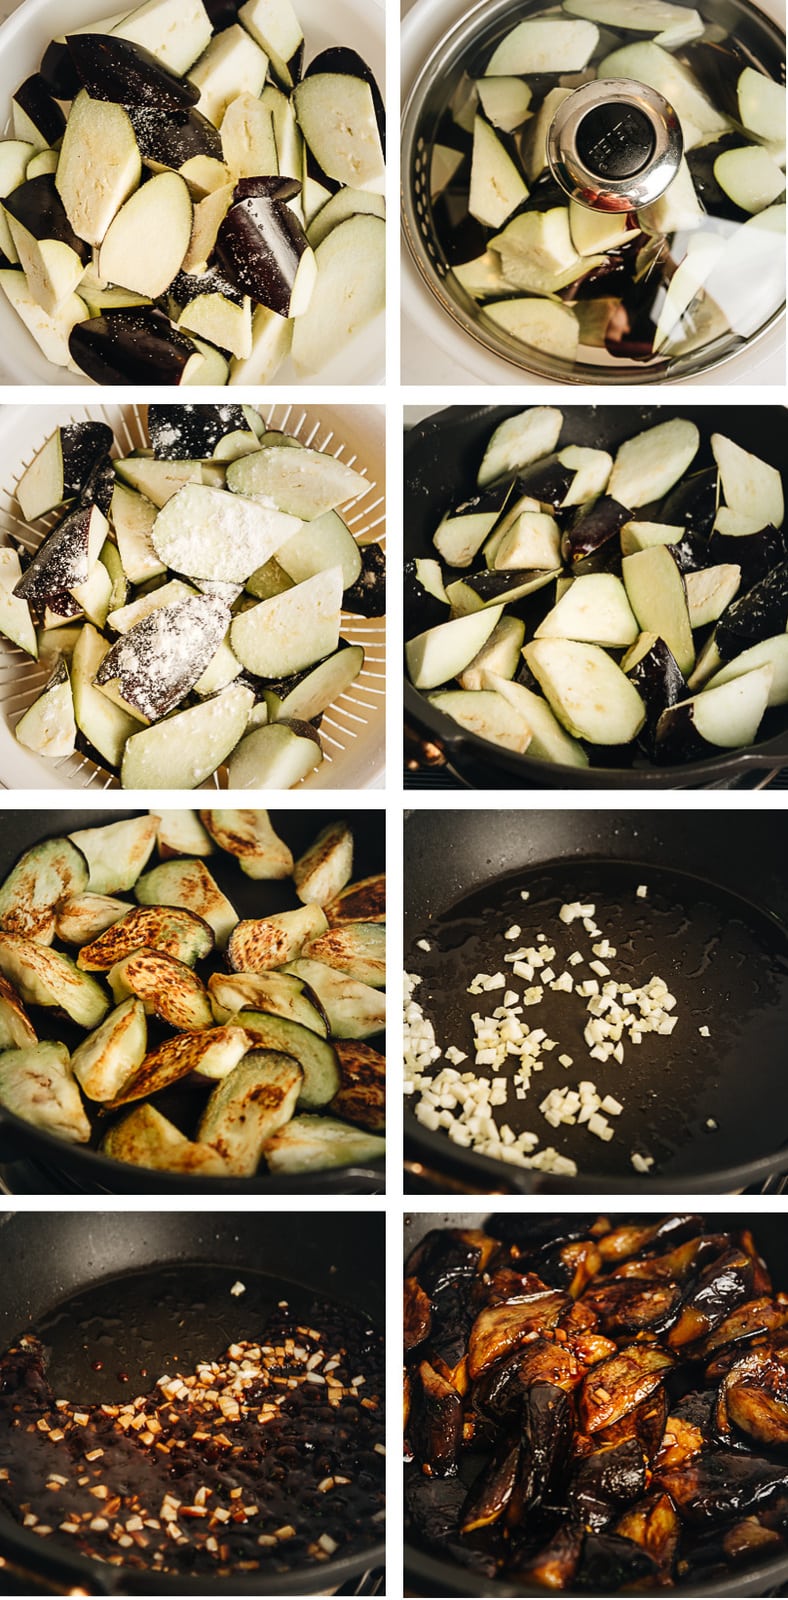
Home made Chinese eggplant cooking step by step

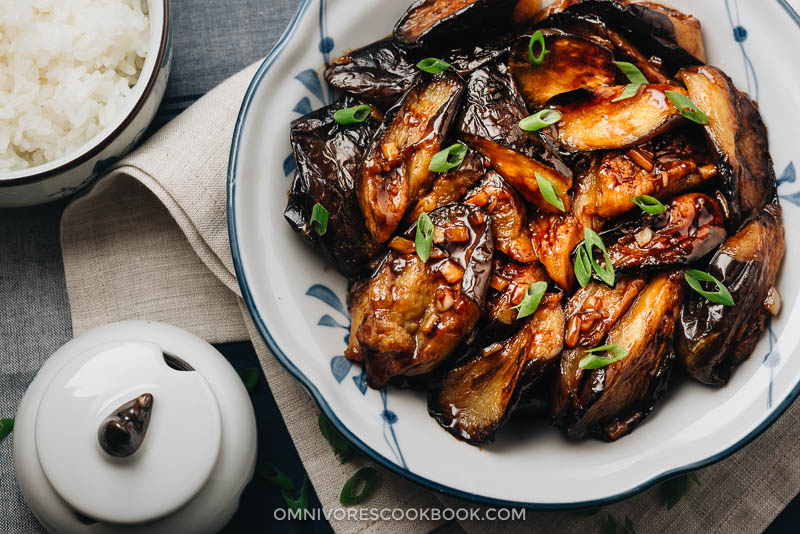
Chinese eggplant with garlic sauce served in plate

Rose Jam Kyiv Style

Thursday, September 8, 2022


Rose Jam Kyiv Style

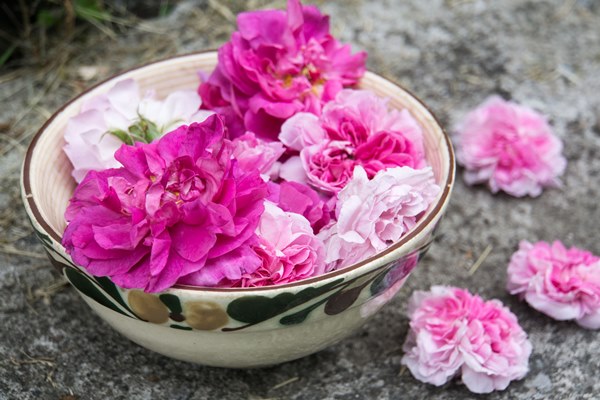
If I had to select a few ingredients that define Ukrainian cooking for me, it would be tomatoes, pork and roses. Tomatoes are essential for borsch, stuffed peppers, ragouts and salads. Pork is eaten in all guises, from lightly salted belly fat to roasted ham and garlicky sausages. Roses, on the other hand, are all about sweetness. Almost every yard in our small village near Poltava has a shrub of the so-called jam roses, usually the rosa damascena variety. Rose jam fills the Christmas pampushky, sweet doughnuts, strudels, crescents and crepes. Best of all, it’s eaten alongside a cup of black tea, a taste of Ukrainian summer at its most opulent. (Despite the common stereotypes, Ukraine is not covered with snow for most of the year. Not only is it large enough to contain different climatic zones, the summers are long, hot and bountiful.)

Ever since I’ve revived my great-grandmother’s roses, I’ve been trying different rose jam recipes, such as this delight I shared two years ago. This summer’s experiment is the Kyiv style rose jam, a variety of preserve made without a drop of water. Raspberries, strawberries, blueberries, gooseberries and cherries are the most common fruits used in Kyivske varennia, Kyiv style jam. The fruit is cooked in syrup and then drained and rolled in fine sugar. The result is more of a sweetmeat than the usual runny conserve. The rose jam Kyiv style is different, however. The rose petals are crushed with sugar and no cooking is required.

This recipe also comes from my great-grandmother Olena’s cookbook. “200g of sugar for every 100g of petals; use it to stuff sugar dough crescents,” she writes. The instructions are simple–trim the white part of the petals, pound into paste with sugar and add a spoonful of lemon juice to preserve color.

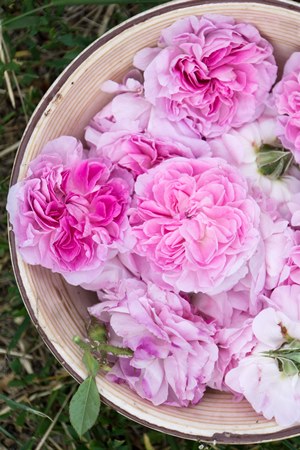
The roses used for jam can be any fragrant variety with thin, delicate petals. Since you don’t wash them before making jam, be sure that your roses are unsprayed. Pick them in the morning after the drew has dried and after trimming the corollas, shake the petals to remove any bits of stamens and leaves.

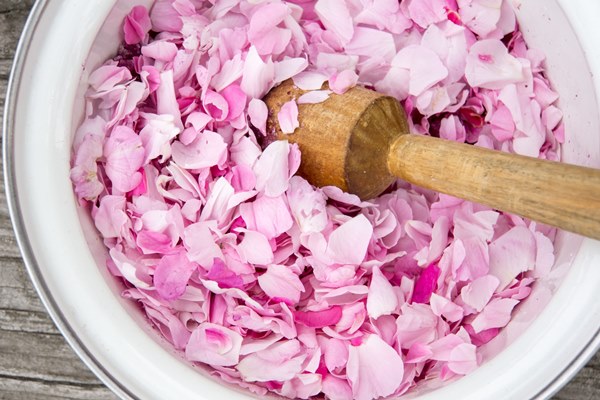
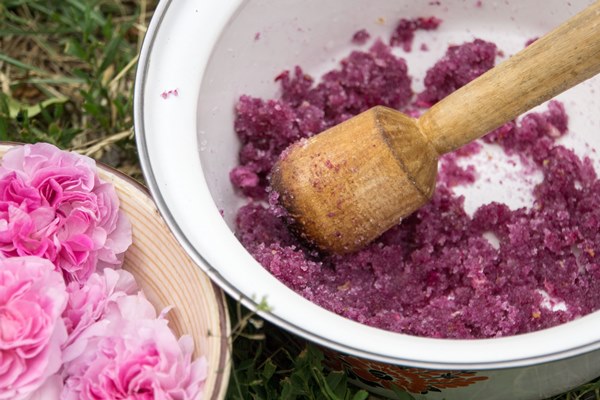
At home I probably would have whirred the whole thing in a blender, but at my grandmother’s place there was only a wooden pestle, so the old-fashioned method it was. I didn’t miss any of the conveniences, however, because making this jam is such a heady and fragrant activity that I didn’t need to rush it. If the aroma of fresh roses was intense, pounding the petals with sugar crystals amplified it to the point that it felt like a tangible presence–honeyed, sweet, with a touch of clove and raspberries.

I store the jam in the fridge. It’s uncooked, but the high proportion of sugar should prevent spoilage. If you’re making larger quantities, freeze them. I eat rose jam over yogurt, mixed into kefir or milk for a sweet shake or simply dissolved in a glass of mineral water for a cooling summer drink. You can use it as filling for Ukrainian walnut crescents. You can also add a layer of rose jam when making solozhenyk, millefeuille crepe cake. The color keeps well, and the flavor becomes more intense with maceration.

Olena also notes that Kyiv style rose jam is “a great cure for colds and winter pallor.” As if one could doubt it.

Kyiv Style Rose Jam (Київське Трояндове Варення)

From my great-grandmother’s Olena’s cookbook

The proportion of petals to sugar is 1:2 by weight, but some varieties are slightly bitter, so you might want to increase the sugar proportion slightly.

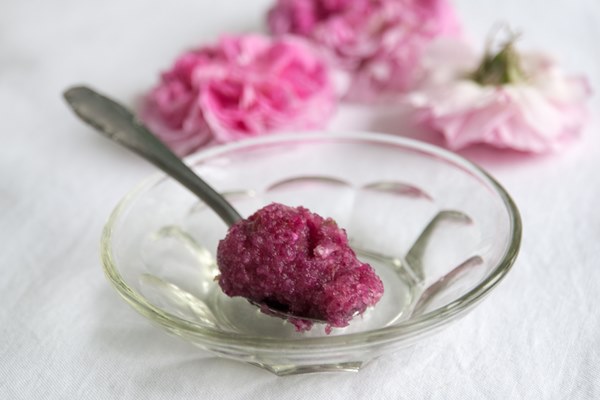
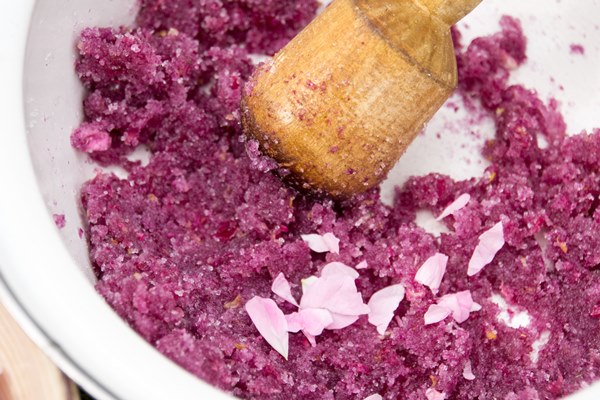
Do yourself a favor; use a pestle. I didn’t even have the mortar, so I pounded the jam in a heavy bowl. Sugar makes it easy to crush the petals. Pound as if you want to crush each petal into pulp, and soon enough you will have a dark fuchsia colored pomade.

Makes 1 one pint jar

125 g (1/4 pound) fresh, unsprayed and fragrant rose petals (after cleaning, see below)
250-300 g (2 1/4 – 2 1/2 cups) sugar
Juice of 1/2 lemon

The jam is uncooked, so make sure that all of the implements you use for making it–mortar, pestle, bowls, spoons are cleaned in hot water with baking soda and then rinsed with boiled water.

If you’re picking roses yourself, gather whole flowers in the late morning when their perfume is at its strongest. Spread them out on a towel. Holding each flower upside down, snip the petals around the heart of the flower using scissors. Shake the petals in a colander to remove stamens and weigh them. You should have 125g.

Mix with sugar and process with a blender or use a mortar and pestle to reduce petals to thick, perfumed paste. For this quantity of petals, it would take about 15 minutes. Add lemon juice and mix well.

Spoon jam into sterilized jars (how to sterilize jars). Seal immediately by closing the lid of the jars tightly. Store in a refrigerator. If you’re making larger quantities, consider freezing them.

Photography by Bois de Jasmin


Candied peel2

The Sugar Plum Fairy bade Marie and Nutcracker sit down while a feast was brought before them: teas, cakes and the rarest of fruits. The food was the feast, first for the eyes, then for the palate… Marie hardly had time to nibble at her sweetmeats before the next diversion was presented: the music abruptly changed to an adagio tempo. Arabian dancers dressed in gauzy veils garnished with gold medallions and jewels swayed hypnotically past… The rich aroma of coffee drifted past.  –from E.T.A Hoffman’s The Nutcracker and the Mouse King.

The last days of each year are invariably orange hued for me: an evening spent peeling the stubborn orange peel with orange stained fingers and tossing the curls into the fire; the delicious icy chill of mandarins brought home from an outdoor winter market; the vanilla-orange sweetness of vin d’orange and slender orangettes dipped in chocolate. As I set the ingredients to make candied orange peel, I am once again a little girl watching her grandmother making this confection. To prevent me getting near the boiling sugar syrup, I would be given a large illustrated volume of E.T.A Hoffman’s The Nutcracker and the Mouse King. To this day, the scent of oranges conjures visions of fairy kingdoms, groves made of candied fruit and coffee scented dancers.

Even though I make candied oranges often, the process of transforming fresh fruit into a crystalline morsel has not lost its magic for me. As the peel softens, absorbs sugar and becomes more and more jewel-like, its scent likewise deepens. Smell the oranges when you peel them—the perfume is floral and bright, with a bitter, metallic-waxy note. As the peels are blanched, the bitter notes vanish, while the orange blossom accent becomes more pronounced. The fragrance is no longer bright, but rather flat. Yet, as the peels are cooked in sugar, their aroma is once again revived. At the end of the preparation, the transparent, golden strips smell of honey, caramel and orange liqueur.

There are numerous recipes for making candied citrus peel, and the method is fairly straightforward—first, the peel is either soaked in water for several days or boiled to remove bitterness; then it is cooked in sugar syrup till transparent. My grandmother favored the soaking method over the course of several days, but I find that it tends to accentuate the waxy, metallic facets of orange perfume. Moreover, most commercial orange varieties today are not nearly so bitter as to necessitate a long soaking. My favorite recipe takes only two hours of work and an overnight maceration in syrup, which results in fragrant, fresh tasting peel.

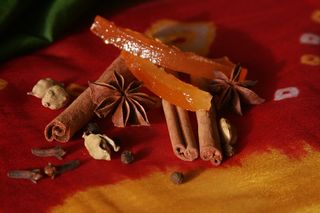
The below recipe comes from the renowned French pastry chef Pierre Hermé. It was published in almost all of his books, including Le Larousse des Desserts. The vanilla and spices lend a brilliant twist to the citrus aroma, and as long as you do not add more spices than the recipe requires, they will not overwhelm the delicate floral caramel perfume of candied fruit. Another successful variation I discovered is to use 1/8 teaspoon saffron and ¼ teaspoon ground cardamom.

IMG_5460citruspeel

Pierre Hermé’s Spiced Candied Orange Peel

Orange peel can be used in baking or on their own as a candy. One of my favorite ways to eat candied oranges is to slice them in tiny cubes and scatter them over my morning yogurt. I cannot imagine a better or more fragrant start to my day.

If you want to make orangettes, slice the peel in slender strips and once they are dry, dip them in melted chocolate.

Peel of 4 grapefruits or 5 oranges or 6 lemons

For spiced syrup:
4 cups water (1L)
2   1/4 cups (about 450g) sugar
1/4 cup lemon juice
10 black peppercorns
1/2 star anise
1 teaspoon vanilla extract or 1 vanilla bean, slit lengthwise

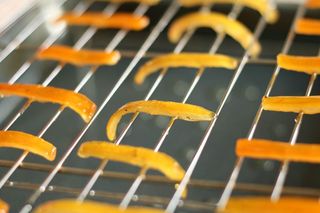
Thickly slice off the peel from the fruit. It can be left in large pieces or cut into thin strips. Cover with water and bring to boil. Simmer for 3 minutes, drain and rinse under running water for 2 minutes. Repeat two more times. This process softens the peel and removes bitterness. I do not mind a hint of bitterness, but especially if you are using grapefruit peel, taste it after the third rinsing and decide if you want to repeat the boiling.

Drain the peel well and absorb excess water with paper towels. In the meantime, mix the ingredients for the syrup, except for the spices. Bring to boil, skim and let the sugar dissolve completely. Add spices and peels. The syrup should cover the peels completely, and it is best to err on the side of having too much, rather than too little. Cover the pot and leave it to simmer on low flame for 1.5 hours. At the end of 1.5 hours, the peels will be transparent and the syrup thick. Turn off the fire and leave the pot at room temperature for 12-24hours.

Next day, remove the peel from the syrup and drain on a rack. Once the peels are dry, even if somewhat sticky, they can be tossed in fine sugar and stored in an air tight container. I usually skip the sugaring and simply layer them between sheets of wax paper. Best stored in the fridge.

The syrup used to poach the peel is fragrant and delicious. It usually gels nicely and can be used as jam on toast or over ice cream. Try diluting it with sparkling water for a delicious lemonade. It also makes a fantastic glaze for lamb or chicken: mix 1 tablespoon of syrup with olive oil and crushed garlic and brush over the meat towards the end of grilling.

I often do candied kumquats and feel very inspired by your spicy syrup!

May I suggest an additional use for the syrup?
Pour some on a really fresh and good ricotta cheese.
You can arrange individual portions in tiny transparent glasses – the end result looks great and tastes delicious (and is rather low calorie, too)!
You may also add dark chocolate chips or a leaf of mint to the presentation. 

French Fig Jam


French Fig Jam

Jam has become such an industrial, mass-produced product that it might be hard to imagine making it at home. This is not the case in France–or much of Europe, for that matter. When I visited my friend on her farm in Burgundy, we drove around for hours only to discover that all of the stores were out of preserving supplies. We ended up ordering a case of jars from an online shop, because the figs were ripening fast.

My friend follows a recipe that has been in her family for several generations. We cut figs into quarters and weigh them to determine the amount of sugar. It’s 2 parts fruit to 1 part sugar. Figs are sweet, so we add lemon juice. As their juices melt into sugar, the syrup becomes pink, then purple, then burgundy, like the famous wines of the region. The green perfume of figs transforms as they cook. The fragrance of natural coumarin in their peel, the aromatic that smells of toasted almonds and cherries, becomes more pronounced and richer. The lemon zest gives the fig jam a twist reminiscent of Shalimar.

Homemade jam is so much better than even the artisanal brands that I can’t recommend making it highly enough. I’ve already posted several jam recipes, and as I mentioned previously, make a small amount and see what I mean about perfume and taste. Back in Brussels, for instance, I only have access to expensive, imported figs, so I make only a jar or two of jam. Yet, it’s such a sumptuous treat with cheese, bread or yogurt that it’s worth the effort.

The effort, at any rate, is not extensive, since you can break up the work. You macerate figs with sugar and lemon juice in the evening, bring the mixture to a boil in the morning, and then the next day, bring it to a final boil and it’s done. Autumn has been bottled.

Confiture de Figues à l’Ancienne

You can use any type of fig you want for this recipe. Black figs make for a beautiful burgundy jam, while yellow ones cook down to a warm beige hue. Some recipe call for removing the lemon peel once the jam is cooked, but I like its sharp flavor, so I leave it in.

Of course, this jam can be canned and stored in your pantry, but since I make only a jar or two, I keep it in the fridge.

500g (1lb) fresh figs
250g (1 1/4 c) granulated white sugar
1 lemon

Squeeze juice out of the lemon. Remove the yellow zest in strips from one half.

Wash the figs, dry thoroughly and remove the hard stems. Cut into quarters. Cover with sugar, add lemon zest and juice and leave to macerate overnight. Bring the mixture to a boil the next morning over low heat and once the sugar starts dissolving stir gently with a wooden spoon to encourage the rest of the sugar to dissolve. Remove from the heat and leave till the evening or the next day. (Once the mixture is cool, you can cover the pan).

The next day, bring the mixture to boil once again and simmer it over low heat till the fig quarters begin to look translucent and the syrup thickens. (To test the thickness, pour a drop of syrup on a plate and see if it forms a wrinkle when you touch it with your finger. It occurs at 220F/105C.) It should take around 10 minutes, but the time depends on the water content of your fruit. Remove jam from the heat, remove the lemon peel, if you wish, transfer into clean jars and once it cools down, store in the fridge. (Or you can look for the canning instructions online.) Refrigerated, the jam will keep for 5-6 months.

I prepare the jars by washing them with baking soda, drying and then heating them in the oven at low temperature (225F/130C) for 20-30 min.

Photography by Bois de Jasmin

Reader's Comment

Muriel: Hey Victoria, so I went and bought some figs and followed your recipe and while it was cooking, the wonderful smell made me think of something I’d read in school. It’s taken from Fables de Mon Jardin by Georges Duhamel, and it is all about the smell of the jams : “Ici, monsieur, lui dis-je, nous faisons nos confitures uniquement pour le parfum. Le reste n’a pas d’importance. Quand les confitures sont faites, eh bien! Monsieur, nous les jetons.

J’ai dit cela dans un grand mouvement lyrique et pour éblouir le savant. Ce n’est pas tout à fait vrai. Nous mangeons nos confitures, en souvenir de leur parfum.”

Akha Masoor Dal, Muslim Style With Easy Steps

Wednesday, July 20, 2022


Sabut Masoor
Water, Elaichi, Dalchini, Black Pepper, Lovang, Coriander Powder, Turmeric Powder, Hing, Salt, Tomatoes, Oil,
Ginger garlic paste Tej Patta, Chicken/Mutton Masala, Red Chili Powder,

---

Boil sabut dal with
Water,
Elaichi, Dalchini, Black Pepper, Lovang
Lovang, Coriander Powder, Turmeric Powder, Hing, Salt, Tomatoes,

-----
Open pressure cooker and mix well

Heat oil or ghee
Add ginger garlic mix and then the tej patta
Tej Patta, Chicken/Mutton Masala, Red Chili Powder,
Mix well. Add some dal and mix it all together. Now pour rest of the dal and serve with rice.

====


Ingredients

  • ½ cup khari masoor ki daal or black gram lentils also known as kaali daal or sabit masoor ki daal
  • ½ teaspoon salt
  • ½ teaspoon red chili powder
  • ¼ teaspoon turmeric
  • ½ teaspoon coriander powder
  • ½ teaspoon garlic paste
  • 2 teaspoon lemon juice or adjust to taste
  • ¼ cup mint leaves
  • 2 tablespoons oil for tempering
  • 3 garlic cloves sliced
  • ½ medium onion sliced

Instructions

Pressure Cooker Instructions:

  • Wash lentils and soak for 30 minutes.
  • Drain the soaked lentils and place in a pressure cooker with about 1 - 1 ½ cup water.
  • Add salt, red chili powder, turmeric, coriander powder and garlic paste.
  • Stir, and put on pressure cook for 30 minutes. If you didn’t have time to soak the daal, you can add unsoaked daal and pressure cook for 45 minutes.
  • Release pressure and open the lid. Switch to saute / sear mode and whisk well or mash with a wooden spoon so that some of the lentil grains soften and break.
  • At this stage you can add water or cook the daal on saute / sear mode depending on how thick or thin you want the lentils to be.
  • Heat oil for tempering (tarkin a small frying pan or wok.
  • Once the oil is hot, add sliced onion followed by the garlic 2 minutes later. Cook till golden brown. Make sure they don’t burn.
  • Add the mint leaves and lemon juice to the daal, and stir. Let the daal cook for a minute and then pour the onion and garlic tempering over the hot lentils.
  • Serve hot with rice or roti.

Stovetop instructions:

  • Wash lentils and soak for 2 hours. Drain the soaked lentils, and place in a pot with water (about 3 cups water).
  • Add salt, red chili powder, turmeric, coriander powder and garlic paste. Bring to a boil, and turn heat to low.
  • Cook the lentils on low heat till soft, which will take about an hour.
  • Once the lentils are almost tender, whisk well or stir & mash with a wooden spoon for 2 -3 minutes so that some of the lentil grains soften & break making the daal rich and creamy. You can also pulse 1 - 2 times with a hand blender. If necessary, add water and then cook for a couple of minutes till the required gravy consistency is reached.
  • Add lemon juice and mint leaves, and give it a stir.
  • When the lentils are almost ready heat oil for tempering (tarkin a small frying pan or wok.
  • Once the oil is hot, add sliced onion followed by the garlic 2 minutes later. Cook till golden brown. Make sure they don’t burn.
  • Pour the onion, garlic and the oil of the tempering (tarkover the hot lentils. Be careful as the oil will sizzle.
  • Serve hot with rice or roti.

Notes

  • Khari masoor ki daal is made from the whole form of masoor ki daal (or pink lentils). It is also known as sabut masoor ki daal or sabit masoor ki daal. In English it is known as brown lentils or black lentils.
  • Don’t confuse these lentils with the ones used in daal makhani. The lentils used in daal makhani are made from whole black gram or sabit urad dal, which is the whole form of urad daal.
  • If you don’t have or like mint leaves, you can skip them.
  • In the tempering step you can use just garlic or just onion. Both add a unique flavour to the daal.