Cheesy Chicken Enchilada Skillet

Tuesday, December 15, 2020


YIELD4–6 servings

ACTIVE TIME 25 minutes

TOTAL TIME 25 minutes


INGREDIENTS

1 tablespoon vegetable oil
1/2 onion, chopped
2 garlic cloves, finely chopped
1 teaspoon ground cumin
1 teaspoon kosher salt
1 (16-ounce) jar medium red salsa
1/2 cup sour cream, plus more for serving
4 corn tortillas, torn into quarters
4 cups shredded cooked chicken (from 1 [2 1/2-pound] rotisserie chicken)
1 (15.5-ounce) can black beans, drained, rinsed
1 cup shredded Mexican cheese blend
Pickled jalapeños and cilantro (for serving; optional)


PREPARATION

    1. Preheat oven to 500°F. Heat oil in a 10" heatproof skillet over medium. Add onion, garlic, cumin, and salt and cook, stirring, until softened, about 5 minutes.
    2. Transfer onion mixture to a large bowl; reserve hot skillet. Add salsa, 1/2 cup sour cream, and 1/4 cup water to onion mixture and stir to combine. Fold in tortillas, chicken, and beans until thoroughly coated. Return mixture to reserved skillet and cook over medium heat until warmed through, about 3 minutes. Sprinkle cheese over.
    3. Transfer skillet to oven and bake until cheese is melted and bubbling, about 5 minutes. Top with sour cream, jalapeños, and cilantro, if desired.

Scallion Pancakes with Dumpling Wrapper

Sunday, December 13, 2020

 My mom has mentioned this method to me before as an interesting shortcut shared on Chinese cooking forums, and I’ve also seen it on Woks of Life. Whoever came up with it is genius because this does deliver somewhat flaky layers without the dough kneading work. Not to mention, a great way to use up leftover wrappers if you’re making dumplings at home (see our potstickers recipe here).

Ingredients
Easy to make as few as you want at one time, keeping the rest of the dumpling wrappers in an airtight container and refrigerated)

  • Store bought dumpling wrappers, usually found in the refrigerated section of Asian grocery stores or international markets. You’ll need 4 to 5 wrappers per pancake. IMPORTANT: Use round, white dumpling wrappers and not yellow, square, or wonton wrappers which are too thin for this hack. The ones I’m using here are by Twin Marquis brand.
  • Oil for brushing and pan-searing.
  • Scallions, chopped. I use approximately 1 full stalk of scallions per pancake.
  • Salt for sprinkling on

Directions
1. Put chopped scallions, oil, and some salt in separate little bowls to get everything organized.

2. On a cutting board or clean, dry surface, place 1 dumpling wrapper on the surface.

3. Brush with a thin layer of oil (use a paper towel if you don’t have a brush), sprinkle with a little salt and scallions. Note that many store bought dumpling wrappers already have salt in them. I cooked one finished pancake to test, then adjusted salt and scallion levels accordingly for subsequent ones.

4. Place another dumpling wrapper on top like a sandwich and firmly press it down with your palm and fingers to flatten. Next, repeat with the oil brushing, sprinkling of salt and scallions, and new layer of dumpling wrapper. I did 5 layers in total.

5. After your last layer, firmly press everything down again and then roll it out with a rolling pin until thin.

6. Heat 1 Tbs oil or just enough to coat the bottom of a pan over low-medium heat (lower heat than the batter method to avoid burning the thin dumpling wrappers). After the oil is heated, pan fry your scallion pancake about 3-4 minutes on each side. Lift an edge to check doneness, and when the bottom is lightly browned, brush a little oil on top and flip.

I found these were best enjoyed immediately!

ways to use leftover dumpling jiao zi wrappers skins
lulus balloon sleeve sweater petite

easy homemade chinese food recipes cooking blog
scallion pancakes shortcut using dumpling wrappers

Again I usually eat my scallion pancakes alone, but this sandwich Nick put together was delightful.

We usually have blanched broccoli crowns on hand for Nori and various dishes like pasta, and they worked perfectly here as a filling:

  1. Start with a handful of blanched broccoli florets. We dip broccoli crowns in boiling water for about 90 seconds to 2 minutes so it still has a crisp texture, and keep some of the stalks for extra crunch.
  2. Mix 1 teaspoon hoisin sauce, 1/2 teaspoon sambal oelek chili paste or sriracha (optional), and 1 teaspoon hot water to thin out the hoisin.
  3. Toss the broccoli florets into the sauce. I used a pan here just as a quick way to heat up leftover broccoli and mix with the sauce.
  4. Place into a pancake, drizzle Kewpie mayo on top, and enjoy. Sub regular mayo if you don’t have Kewpie, but I do love this Japanese version of mayo made with some rice vinegar!

Chinese Corn Egg Drop Soup


Chinese chicken corn soup and scallion pancake recipes


Chinese Corn Egg Drop Soup

Ingredients

  • 1 can cream style corn; do not drain* (cream style corn is dairy free)
  • 2 cups good broth** 1 can or half a large box of broth
  • 1 to 2 eggs beaten in a bowl with a fork
  • Salt, black pepper, & white pepper to taste

Optional

  • 1/3 lb uncooked ground chicken my preference - see quick marinade below, or use any cooked chicken you have, like shredded rotisserie chicken.
  • 2 teaspoons corn or tapioca starch***
  • Sesame oil, scallions or cilantro for garnish

Instructions

  • Note: In the photos here I had doubled this recipe to make a full pot, but added 2 cups of frozen corn instead of a second can of cream style corn.Pour broth and corn in a pot and heat it up over medium heat until it reaches a low simmer. If using a mix of frozen corn and canned corn like in these photos, I put the frozen corn in first and let it simmer longer before adding in the canned.
  • Add in optional chicken. If you're using uncooked ground chicken, add it to the simmering soup and quickly try to break it up into small pieces using a spatula, as it cooks within the pot. It takes about 5 minutes for ground chicken to cook through while the pot is simmering. If you're adding chicken that's already cooked, it will only take a few minutes to heat up.

  • Mix in optional starch slurry. Mix starch with a little cold water in a separate bowl until well dissolved. Stir this into the soup.

  • Beat eggs with a fork. Then use the fork to gently stir the soup in a circular motion (not too rigorously) while slowly pouring the beaten eggs into the soup to create egg drop "ribbons."

  • Season to taste with salt and pepper. I love lots of pepper on this and add more when serving! I also like to add a dash of optional fish sauce to this soup. Finish by garnishing with scallions or cilantro and a drizzle of sesame on top.

Optional ground chicken marinade

  • If you're using uncooked ground chicken, do this step in the very beginning. I quickly marinade the ground chicken directly in the tray that it comes in. I do about 1 teaspoon light soy sauce, 1/2 teaspoon oyster sauce, 1/4 teaspoon sugar, drizzle of sesame oil. Mix with a spoon and set aside until Step 3 above.

Notes

* Corn type: Traditionally, this soup uses cream style corn (dairy free) which contains a little added sugar, salt, and starch that give the soup a consistency I love. You can also use regular canned corn, or frozen corn which I like because it has no added salt or sugar. Sometimes I'll defrost a bag of frozen corn and blend it up very briefly in my smoothie blender to "cream" it up a bit. ** Broth: My favorite broth these days is Imagine brand low sodium chicken broth which has such a nice aroma, but you can use vegetarian or homemade broth.***Starch is a key thickening agent in Chinese soups (like corn, egg drop, hot & sour), so if you have some available, then I do recommend this step. If you are only using cream style canned corn here, then that already contains some starch in it (compared to regular canned corn or frozen corn which has no added starch). 
quick and simple chinese egg drop soup with chicken
one pot dinner recipe
If you’re adding in uncooked ground chicken, marinate and stir it into the simmering soup, breaking it up quickly into small pieces. This ground meat cooking tool is perfect for this purpose, along with making taco filling or bolognese sauce!
Chinese corn and egg soup recipe with simple pantry ingredients
how to make Chinese chicken corn soup

Stirring in the optional starch slurry, and then adding the beaten egg at the end. I gently stir around the pot in circles (not too quickly!) while pouring in the beaten egg to create ribbons of egg “drop.” 

abercrombie balloon sleeve sweatshirt petite loungewear

weeknight meal Chinese corn and egg soup

Serving suggestion: in Chinese culture soups are usually served alongside a meal and not as the main dish, but I’ve been making a quick meal out of this served with shortcut scallion pancakes! I usually double this recipe (it freezes well) and make several pancakes in advance, and just reheat the pancakes before eating with a quick pan sear.


    5 Tips to Make Your Produce LAST LONGER


    kitchen tips to make your produce last longer

    During this time, we’ve been trying to make our grocery trips as infrequent as possible. This has meant buying a lot of produce in advance, and it has sometimes been a challenge to keep it all fresh with minimal waste. I’ve picked up some tips here and there to make our fruits and veggies last longer, and wanted to share the ones I find the most useful!

    1. Separate bananas

    Bananas are a staple in our household (for easy banana muffins, pancakes, smoothies – you name it!), but when buying a large bunch, they tend to all turn brown at the same time. When stored with other fruits, they also speed up their ripening process. I read this is because some fruits release a gas (ethylene) that causes ripening, and bananas are one of them.

    separate bananas and make them last longer

    ripen avocados quickly with a banana in a bag

    To combat this, we un-bunch our bananas upon getting home and store them away from other fruits to slow down each banana ripening. On the flip side, when we want to ripen something, like a rock-hard avocado, we’ll nestle this next to a banana in a paper bag.

    Extra tip: if you find yourself in need of a very ripe banana e.g. for baking, you can speed-ripen it with 30+ seconds in a microwave.

    2. Contain herbs

    We love using fresh herbs, but often only need a little at once for garnish, then the rest of the bunch often goes bad! Searching for various storage methods online, I picked up these quick tips that have stretched the shelf-life of our herbs:

    kitchen tips make fresh herbs last longer
    kitchen tips make fresh herbs last longer
    • Remove any rubber bands or ties and pluck out any spoiled leaves.
    • This gives the herbs room to breathe. Spoiled leaves create unnecessary moisture and speed up wilting.

    contain fresh herbs to make them last longer

    • Store in a closed container with a paper towel.
    • Containing them controls their temperature and the paper towel maintains the right humidity.

    Doing this, I’ve found some of our herbs can stay fresh for up to a month!

    Extra tip: these steps also work well for keeping larger leafy greens fresh (lettuces, spinach etc).

    3. Slow fruits ripening in the fridge

    Cooling down certain produce slows down their ripening process. While this doesn’t work for all produce (for example, it is not recommended to refrigerate whole fruit like whole melon, kiwi, avocado, or peaches until after they’ve had time to ripen at room temperature), this works well for other fruits, like citrus. For oranges we usually split a bag across two bowls: one for table and one for the fridge, so they ripen at different speeds.

    Extra tip: If you’re juicing a lemon coming out of the fridge: microwave it for 10-20 seconds, until it is no longer cool to touch. Doing this first will help you squeeze more juice out of them!

    4. Freeze

    If a fruit or vegetable is nearing over-ripeness, and I know we won’t be able to consume it in time, we freeze it! We love frozen pieces of overripe bananas for smoothies. There are different ways to do this, but as a general rule: 

    blanching vegetables before freezing to preserve
    freezing over ripe vegetables to make them last
    • Vegetables freeze best if blanched, as this sets their color and texture.
    • Most fruits freeze well as they are. We’ll peel and cut up before freezing, so they’re ready to use.
    cut fruit into pieces before freezing
    freeze ripe fruit pieces in a stasher bag

    If it looks like anything will ‘clump’, we’ll freeze everything spread out on a nonstick baking sheet before storing them in freezer bags.

    freeze chicken stock coconut milk tomato paste cubes in silicon ice tray

    Extra tip: I also LOVE freezing cubes of leftover liquid ingredients for easy use later, especially ingredients that you only usually need a little bit at a time. Using a silicone ice tray, they pop out easily, already portioned out for use.

    5. Grow your scallions

    Scallions are a staple in our household. A lot of Asian-style recipes will call for them (like these scallion pancakes), and we love using them as a topping (see them on our garlic noodles here!). If I don’t end up using the scallion whites for a recipe, I keep the roots in a jar by the windowsill to regenerate, instead of throwing them out.

    grow scallions green onions at home from scraps
    grow scallions green onions at home from scraps
    • Keep ~2 inches of the white bulb end, with roots attached.
    • Place in a clear jar of cold water. The water should cover the roots about an inch high, but the tops should be exposed, out of the water.
    • Keep them by a windowsill with natural light. Don’t forget to change the water out every few days.
    • These will grow in less than a week, and you can just snip and use the green parts as needed. Note, the regenerated scallions are usually a little less flavorful each time.

    Do you have any tips and tricks you use to make your produce last? I’d love to know! To see what we’ve been cooking up, check my Extra Ap(Petite) archives!


    Halwa Poori Nashta - Shehar Bano Rizvi

    Friday, December 11, 2020

    Lmd5c


    Another all time favorite of mine!! Every Sunday my dad used to get this Pakistani breakfast (which includes, Halwa, Poori , Aaloo ki Bhujia and Cholay) from a nearby restaurant. Since I have not been able to find a decent Halwa Poori here in Doha ( and trust me I have been here 12 years and tired them all!), every time we go back to Pakistan, my mother in law gets me this breakfast… my first meal every time I land in Pakistan! 

    It is like a weekend ritual for most of the families in Pakistan to enjoy the lazy weekend with Halwa Poori ka Nashta! (after eating which you get much more lazier!).So when my mum was here, I ventured to make this at home! I have tried making this a couple of times before but either the poori gets crispy and hard or the cholay and halwa doesn’t taste like the restaurant one (I am pretty confident with the Aaloo ki bhujia and make it quite often). But with my mum on my side to guide me , we gave it a shot! AND I am NEVER eating any other Halwa Poori again! It was just as good like it was professionally made (in much more hygienic conditions ;).

    Sooji Halwa

    Serves about 5-6 persons (it totally depends on who’s eating! )


    Ingredients:

    • 1 Cup Semolina (Sooji)
    • 2 Cup Sugar
    • 3 Cup Water
    • 1/2 Cup Oil/Ghee
    • 4 Crushed Small Cardamoms (Chotee Illaichi)
    • 1/8 tsp. Food Color
    • 1 Drop  Kewra Essence
    • Almonds and Pistachios

    Directions:

    1. In a pan, add sugar and the (3 cups) water and the food color and cook till the sugar dissolves to make the sheera (that’s it! DONOT over cook it to make it thick.. Just to dissolve the sugar). Remove it from the stove.
    2. In a seperate wok, heat oil and fry crushed cardamoms for a couple of minutes. Then add Sooji and fry till it just starts to give that aroma of sooji.(DONOT overcook it to try make it change color. It should not change color).Collagehalwa1
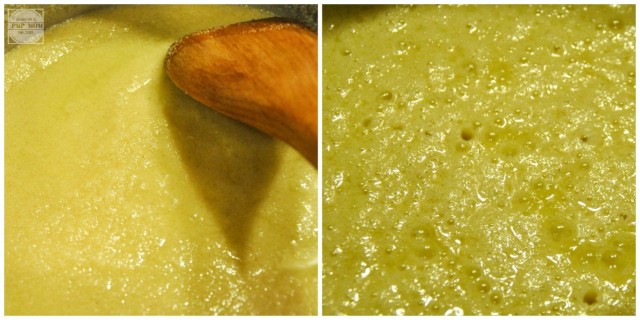
    3. Then add the sheera (we made in step 1) to it and cook for 3-4 minutes  (Maximum of 4 minutes.. put a timer on or watch the time..do whatever but DO NOT cook for more than 4 minutes). It will be very liquid-y but do not worry about that! Trust me!Collagehalwa2
    4. Remove from the heat (VERY IMPORTANT!), put kewra and cover it. Let it sit for about half an hour- the sooji will expand and it will become the right consistency(It WILL… trust me! 🙂 )
    5. Garnish with nuts and enjoy the perfect ‘Halwai wala Sooji Halwa’ with the Pooris. (though you don’t get nuts in the halwai one 😉 )
    The Perfect Poori

    Before I even start…this is the BEST Poori recipe EVERRRRR!!!! Poori is a fried bread, which is part of the traditional breakfast Halwa Poori.

    DSCF8061

    Poori

    Makes about 15-18 small pooris.


    Ingredients:

    • 2 Cup All Purpose Flour (Maida)
    • 1/2 Cup Wheat Flour (Aatta)
    • 2 tbsp. Yogurt
    • 2 tbsp. Oil
    • 1/2 tsp. Salt
    • Oil for Deep Frying

    Directions:

    1. Mix both the flour & salt. Add oil and yogurt and knead the dough with warm water. Cover with cling film and leave to rest for at least an hour.
    2. Heat Oil in a wok on high flame. (The oil needs to be really hot otherwise the pooris will take time to cook and become hard).
    3. Make a dough ball and roll it out with a few drops of oil (so it doesn’t stick). DONOT use dry flour to help you roll it out (that’s another reason for poori getting hard).
    4. I use my Roti Maker (My new absolute favorite gadget in the kitchen!! It is sooo good it deserves a separate post, which will come soon.. so watch out for that!) to roll the pooris and pre-roll all of them before I start frying.DSC_0060 (Medium)
    5. When the oil is hot, put the poori in and press it down a little with the skimmer spoon, and fry for a minute (both sides) and take it out. (Don’t let it turn brown – it will get crisp/hard and will not be soft).Collagepoori1
    6. The Perfect Pooris are ready! And they stay soft even if you leave them uncovered!

    Sso9K


    VLbmU

    Aaloo Ki Bhujia

    Serves 2-3 persons


    Ingredients:

    • 250 gm. Potatoes (cut into small cubes)
    • 1/2 tsp. Zeera (Cumin Seeds)
    • 1/4 tsp. Kalonji (Nigella Seeds)
    • 1/4 tsp. Meithi (Fenugreek Seeds)
    • 1/4 tsp. Saunf (Fennel Seeds)
    • 1/2 tsp. Red Chili Powder
    • 1/4 tsp. Haldi (Turmeric Powder)
    • 1/2 tsp. Salt
    • 3-4 Whole Dried Red Chilies
    • 1 stem Karhi Patta (Curry Leaves)
    • 1 tbsp. Oil
    • 1 tsp. Imli Paste (Tamarind)
    • 2 Green Chilies
    • 1 tbsp. Fresh Coriander Leaves
    • 1 tsp. Mixed Pickle (The Secret Ingredient)

    Directions:

    1. Fry zeera and whole red chilies in oil till it turns a little brown.DSC_0007
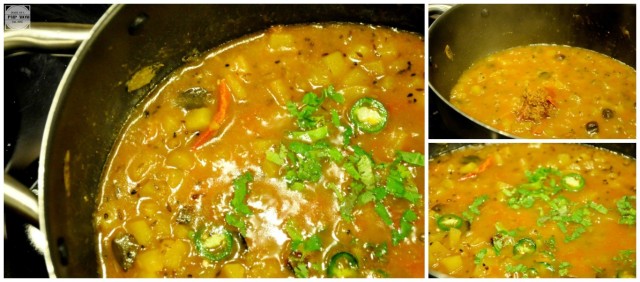
    2. Add Aaloo and all the spices (kalonji, meithi, saunf, red chili powder, haldi, salt and karhi patta) and fry for a few more minutes. Then add  about 1 cup water and let it cook covered on low heat.Collage1c
    3. When the potatoes are soft, mash a little, add imli paste and the pickle and cook for another 2-3 minutes.
    4. Garnish with coriander leaves and green chilies.Collage2c
    5. Enjoy!

    Cholay


    Favwr

    Cholay

    Serves 4-5 persons


    Ingredients:

    • 1 lb. Boiled Cholay (Chick Peas)
    • 2 tbsp. Oil
    • 2 tbsp. Onions (Chopped)
    • 1 tsp. Salt
    • 1 tsp. Zeera (Cumin Seeds – Roasted and crushed)
    • 1 tsp. Dhanya Seeds (Coriander Seeds – Roasted and crushed)
    • 1 tsp. Red Chili Powder
    • 1/4 tsp. Haldi
    • 1/2 tsp. Ginger Paste (or Powder)
    • 1/2 tsp. Garam Masala
    • 1 tsp. Mixed Pickle
    • 2 Tomatoes (Blended into paste)
    • 1 tsp. Imli Paste (Tamarind)
    • 2 Green Chilies
    • 1 tbsp. Coriander Leaves

    Directions:

    1. Fry onions in oil till they are brown.
    2. Then add all the spices(salt, zeera, dhanya, red chili powder, haldi, ginger paste and garam masala) and after frying for about 2-3 minutes .
    3. Add tomato paste and let it cook covered till the oil comes up.Collage1d
    4. Then add the chickpeas and  a little water (so it covers the cholay).
    5. When done, add imli and pickle, a pinch of garam masala, mash it a bit and then add green chilies and coriander leaves. Collage2d
    6. Done! Enjoy with the Halwa Poori Nashta.

    nYGSW

    D4g87

    jYqrJ

    For related recipes, click HERE