Strawberry Jam by David Lebovitz

Sunday, June 28, 2020

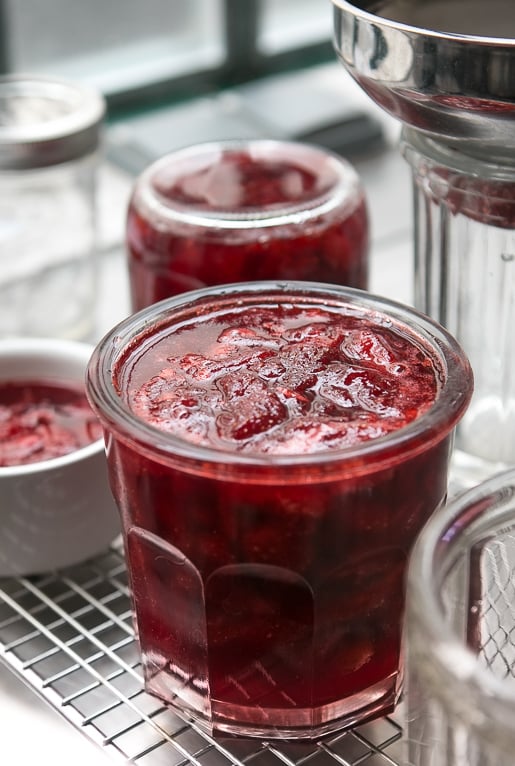
Strawberry Jam recipe

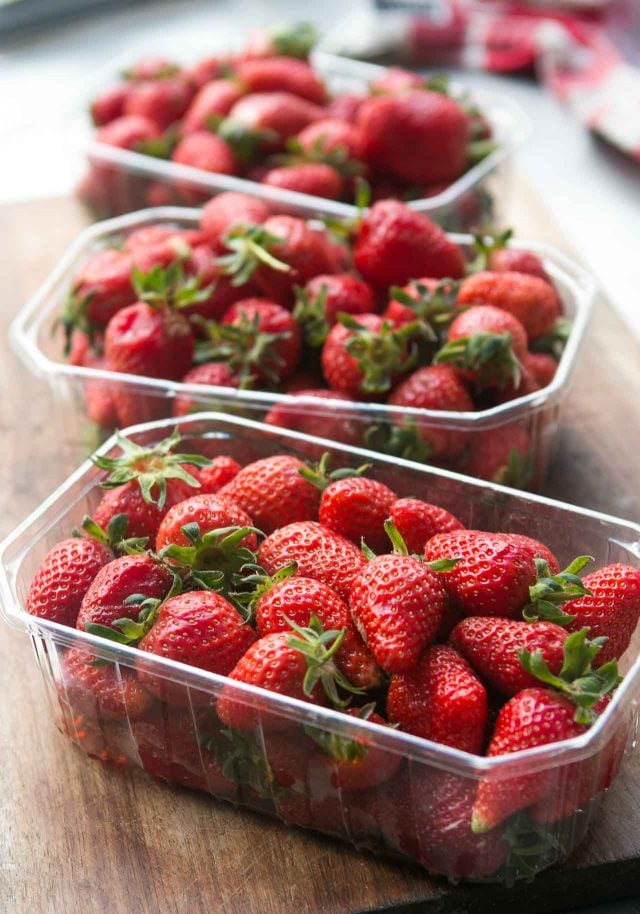
I was bequeathed an overload of strawberries from the Périgord – short answer: I bought four baskets and the vendor, whose booth I shop at often, threw in two extra for free, an unspoken equivalent of a carte de fidelité in Paris – so I’ve spent the past few days washing, hulling, cutting and cooking my unexpected bounty.

I’ve been making a number of things with them. And while I was chopping and thinking (which are probably the only two activities that I’m able to do at the same time), I realized that while I have a Strawberry-Rhubarb Jam recipe on the site, I didn’t have a strawberry jam. So here it is.

Strawberry Jam recipe

Although I’m giving you a recipe for the amount of strawberries that I used, you can use the same proportions if you have just a basket, or a bushel. You’ll just need to do a slight amount of math. Only the cooking time will change, so keep an eye on things. Jam-making is not something you walk away from and you need to rely more on look and feel, rather than exact times. Another thing about jam-making is that fruit and berry jams are always better made in small batches; the shorter the cooking time, the better the flavor. So if you have more than 2-pounds (900g) of strawberries, consider making jam in a couple of batches rather than one big one.
Frozen zabaglione recipe

Strawberry Jam

About 2 pints

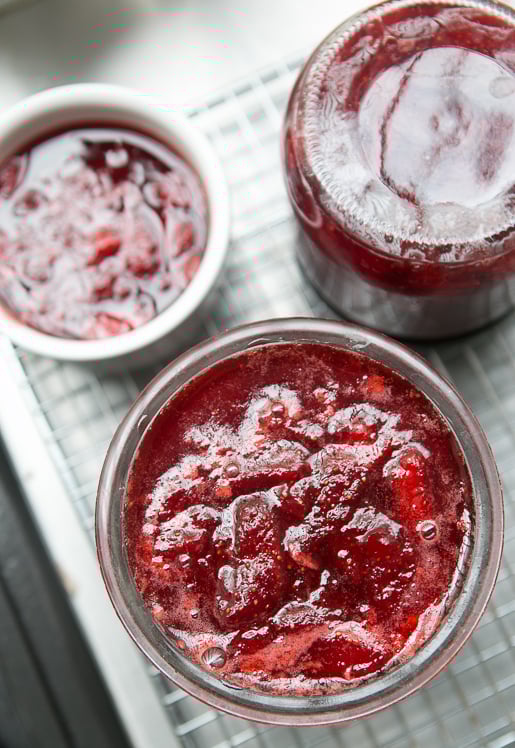
Many traditional recipes use an equal amount of sugar to fruit, by weight, but I find it’s okay to decrease it to these proportions. Sugar is both a thickener and a preservation agent. If you reduce it too much more, your jam may not thicken and won’t keep for a long time. (Which is okay if you want thinner jam, you keep it in the refrigerator, and eat it relatively quickly.) This recipe can be scaled up or down, depending on how many strawberries you have. But if you want to make a lot more, best to make it in a couple of batches. To prepare the jars, pour boiling water into them, as well as into the lids. Let them sit 5-10 minutes, then carefully pour out the hot water and set them upside down on a cooling rack until ready to fill. Since I keep my jams in the refrigerator, I don’t put them up them in a traditional sense. I usually just overturn the jars and let them cool, which provides a reasonable seal, then refrigerate them. I find my jams keep well this way for up to one year. Check the National Center for Home Food Preservation website for instructions on how to can fruit jams. Note: Last season strawberries tend to have less natural pectin than ones that arrive earlier. So your jam may be less jelled. One strategy is the finely grate a green apple into the strawberries before cooking them, which adds pectin. (There are guidelines here for using liquid and powdered pectin.) I don’t mind the slightly runnier jam and it’s terrific on yogurt or served with fresh goat cheese for dessert.


2 pounds (900g) strawberries
1 1/4 pounds (2 2/3 cups, 580g) sugar
one lemon, organic or unsprayed
optional: kirsch (or eau-de-vie, or crème de cassis)

  1. Wash and hull the strawberries and cut them into quarters. If some are larger or smaller, just make sure the pieces all about the same size.
  2. Toss them in a large pot, such as a Dutch oven casserole made of a nonreactive material, with the sugar. Cut the lemon in half, squeeze the juice into the pot, and add the lemon halves to the berries. Stir well, cover, and let sit a couple of hours (up to 8 hours) at room temperature, stirring one or two times while they marinate.
  3. Put a small plate in the freezer. Turn the heat on under the strawberries to medium-high and cook the strawberries, stirring occasionally, as they reduce and the juices thicken. If a lot of foam rises to the surface, skim it away. When the syrup is the consistency of warm maple syrup – it will take about 10 to 15 minutes or so, depending on the pot and berries, turn off the heat and put a spoonful of the jam on the frozen plate and return the plate to the freezer. Check it in a few minutes; if it wrinkles when you nudge it, it’s done. If not, return the plate to the freezer and cook the jam a little more, testing it again. It may take a few times before you get it to the right consistency.
  4. When the strawberry jam is done, remove the lemon and stir in a few drops of kirsch, if using, then ladle the jam into the prepared jars.

Starry meals with Janice | Aditi Rao Hydari shares her undying love for ...

Saturday, June 27, 2020

The ultimate movie night snack platter.

Monday, June 22, 2020


Let me guess. You are trying to eat a little healthier after all that sweet December craziness and perhaps put chips and candy on hold for a while, but you still want something good to snack on in front of a movie this weekend? Well, we’ve got you covered.
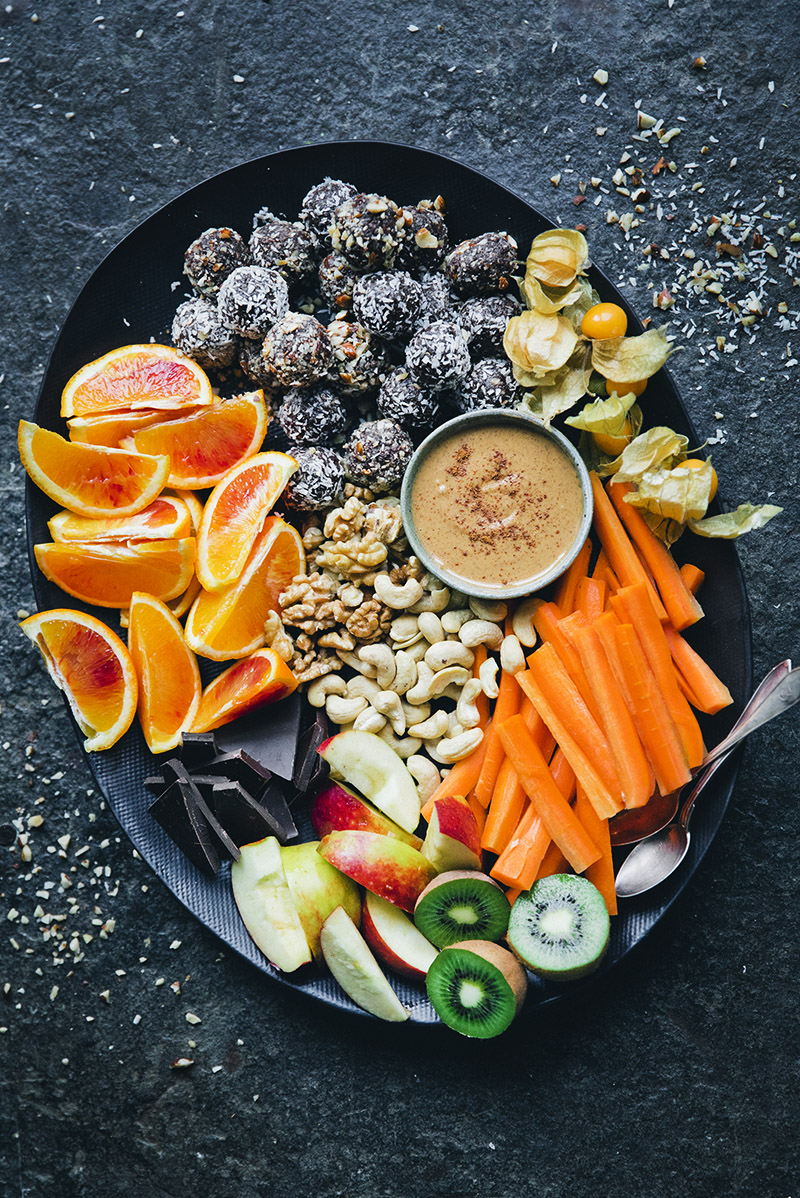
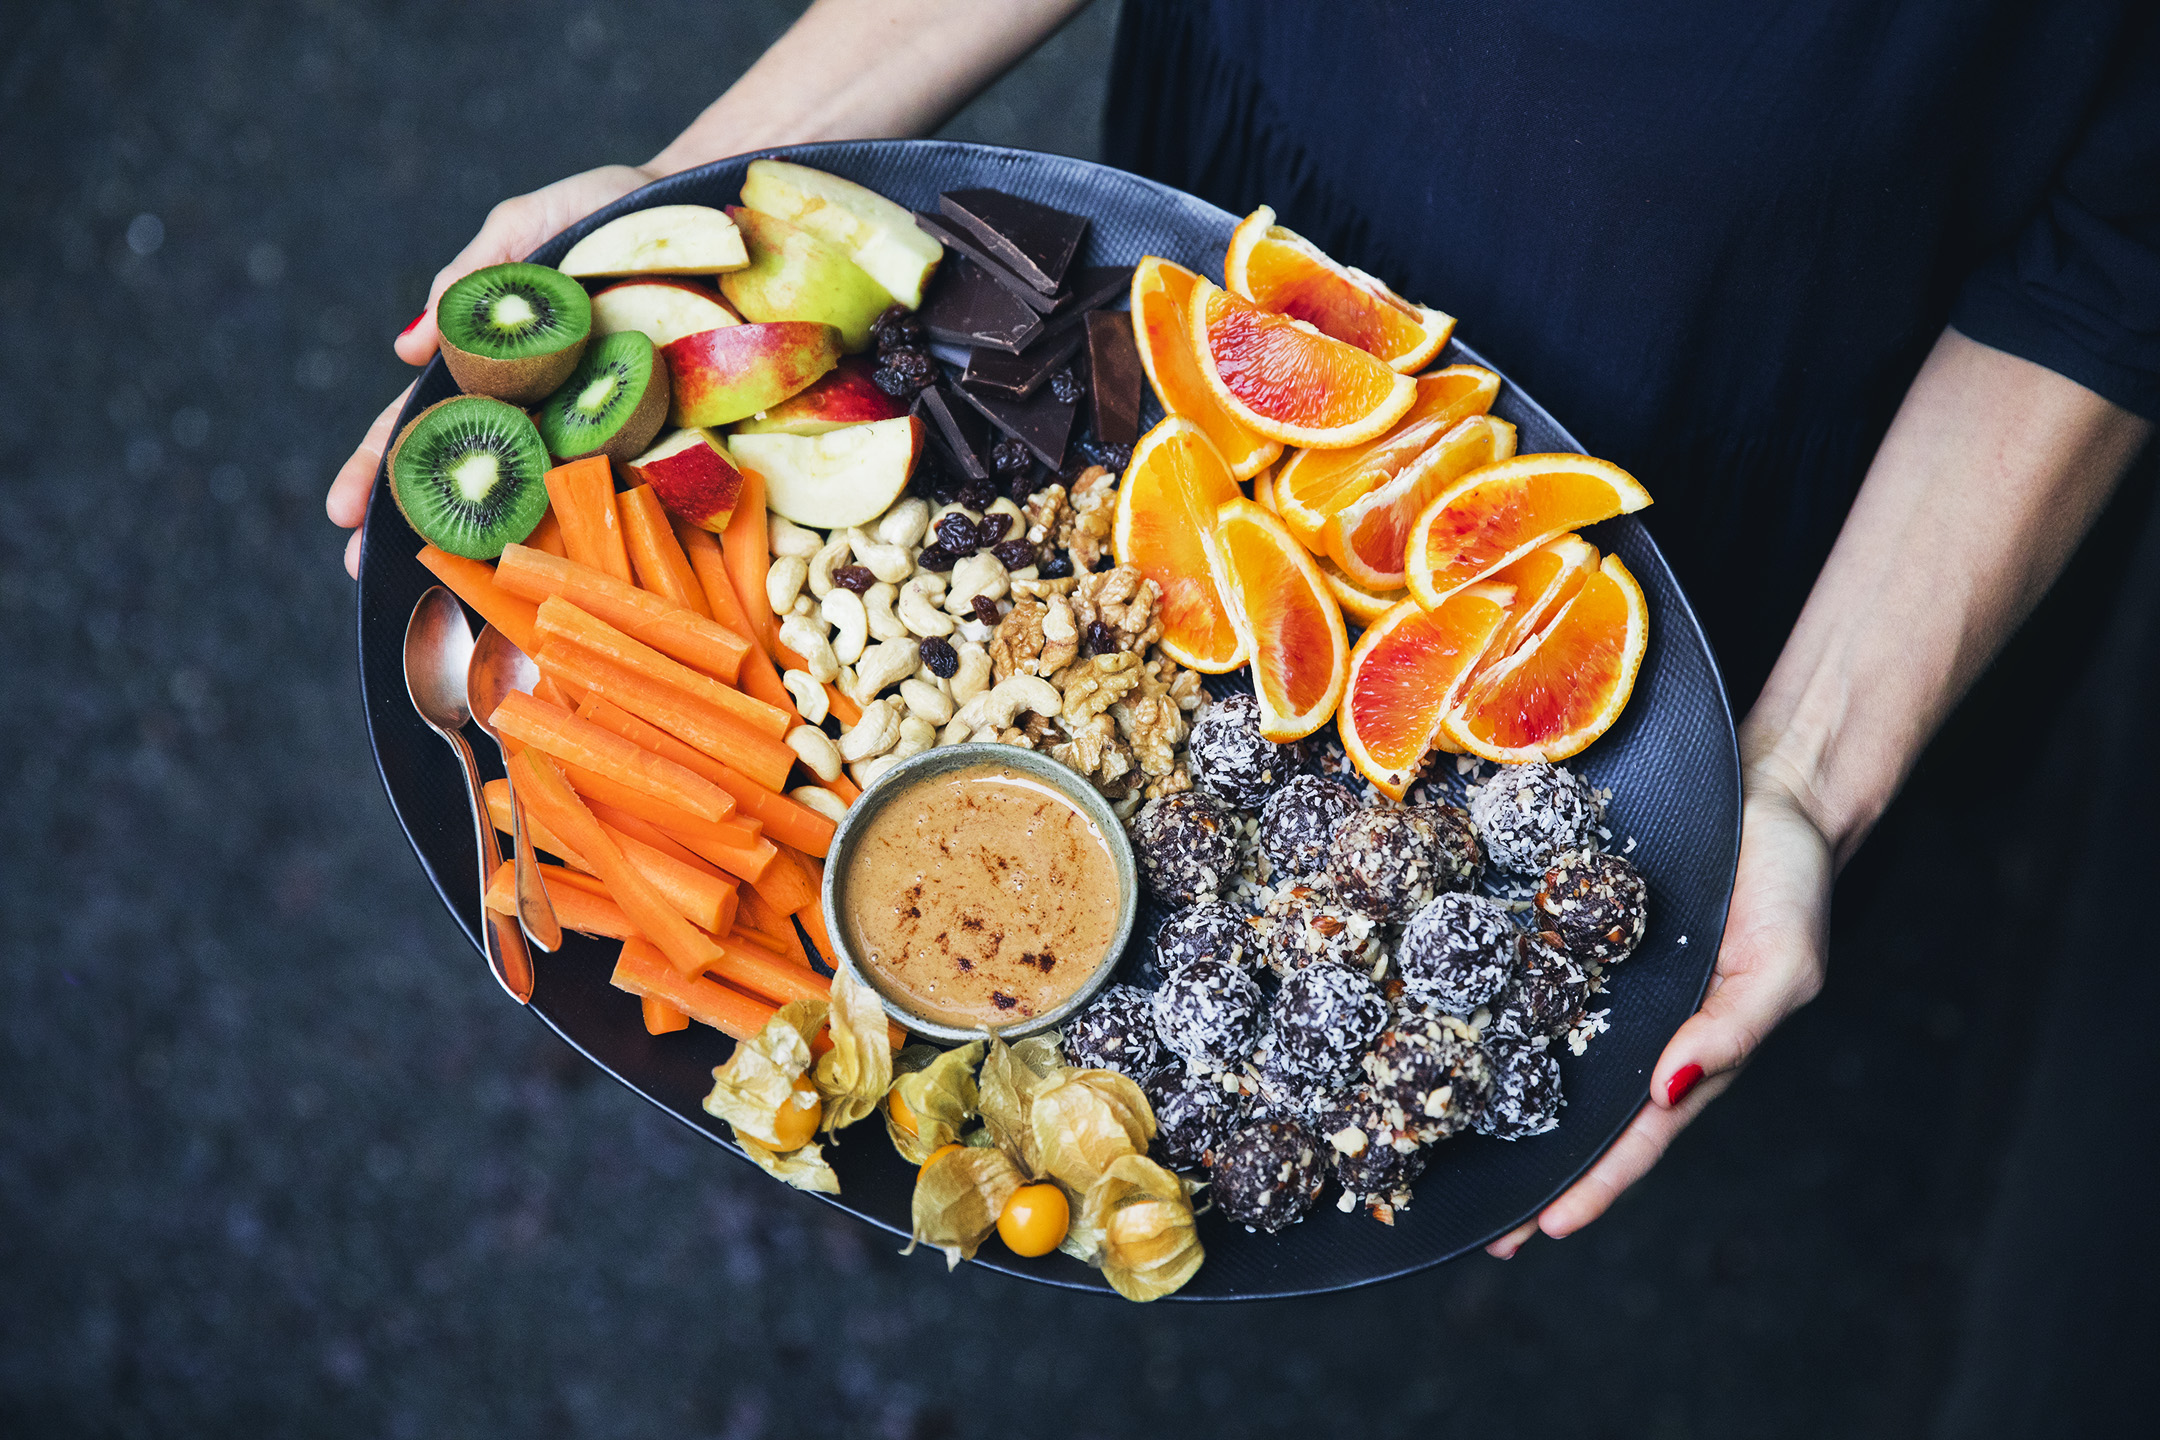
A Healthy Movie Night Snack Platter
We have created a snack platter that leaves nothing behind and that you can toss together in 15 minutes. Fresh fruit, nuts, carrot sticks, dark chocolate, nut butter truffles and a little peanut butter cinnamon dip. Sounds good? It is! And here below is a little video where we show how to make it.

We actually recorded this last year but forgot to share. Our little assistant Noah looks so tiny and sooo cute. Now that we’ve showed you how to make it, go create that snack platter and crash in the couch with your family, friends or pets. And if you have any movie recommendations, please share!
Nut Butter Balls 
15 soft dates, pitted 
2 tbsp coconut oil 
2 tbsp peanut butter 
50 g / 1/2 cup rolled oats 
3 tbsp desiccated coconut 
3 tbsp cacao powder 
1 pinch sea salt 

For rolling 
4 tbsp finely chopped hazelnuts or desiccated coconut

Snack Platter Elements 
3 carrots, peeled and cut into sticks 
2 apples, sliced 
2 kiwi fruits, halved 
A handful nuts and raisins of choice 
A handful physalis/inca berries 
80 g / 3 oz dark chocolate, broken into large bits 
Nut butter balls (see recipe above) 

Peanut Butter Dip 
100 ml / 1/2 cup peanut butter 
2-4 tbsp water 
1 tsp cinnamon 
1 tsp maple syrup (optional)
All the fruit on the platter are just suggestions, you can of course add anything you wish. We do like the mix of truffles, crunchy carrots, crispy apple, nuts, dark chocolate (super delicious to dip in the nut butter) and a citrus fruit.

Add the ingredients to a food processor and mix until everything comes together into a sticky dough. Roll 20-25 small balls between the palms of your hand. Cover them in chopped hazelnuts or coconut. If it doesn’t stick, you can dip each ball in cold water before covering them with the nuts. Store in the fridge while preparing the other snack platter ingredients.  

Make the peanut butter dip by stirring together peanut butter, a splash of water and cinnamon. You can add a little maple syrup if you like it sweeter. Place it in the middle of the platter. Place all other elements around the dip and fill up until the platter is full. Enjoy!
Last week we co-hosted a breakfast celebration at one of our favorite Stockholm cafés for Wasa crisp bread, a client that we have been working with. We created a couple of crisp bread topping recipes for them that were served at the event. And since the spreads turned out so good, we thought you also might be interested in trying them. The first one is a new take on a traditional Swedish summer spread, with yogurt, potatoes, kale, apple, celery and dill. It's sensationally good and perfect also a barbecue side. The second is a herby green pea hummus with a sting and the third is the classic bell pepper and sunflower seed spread from our first book which has been on rotation in our home for many years.

INGREDIENTS
Green Pea and Herb Hummus 
1 x 400 g tin chickpeas (rinsed and drained) 
125 g / 3/4 cup green peas (thawed if frozen) 
4 tbsp tahini 
2 tbsp lemon juice
1 handful fresh mint 
1 handful fresh coriander / cilantro
a few slices jalapeño
1/2 tsp cumin
salt & pepper to taste


Green Pea and Herb Hummus  
A green, herby variety of hummus where the sweetness from the green peas is balanced with spicy jalapeño.

1. Use a food processor to pulse all the ingredients into a smooth spread. 
2. Use water to thin if it feels to thick.
3. Taste and adjust the flavors to you liking.
4. Serve on crisp bread and top with hemp seeds.

Creamy Swedish Summer Spread 
3/4 cup /200 ml Turkish yogurt
2 tbsp capers, coarsely chopped
2 tsp dijon mustard
1 bunch fresh dill
salt och peppar to taste
4 medium sized boiled potatoes
1 green apple 
4 celery stalks 
1 large handful dino kale / cavolo nero


PREPARATION
Creamy Swedish Summer Spread
We have a lot of creamy spreads in Sweden and Denmark but most of them are based on fish and mayonnaise. Our version spread is made with yogurt as base and celery, apples and kale for crunch. Good on bread or as a side for barbecue.
1. Stir together yogurt, capers, mustard, dill and salt and pepper to taste. 
2. Chop the potatoes and apples in small cubes, slice the celery thin and chop the kale coarsely.
3. Stir everything through the yogurt until all is combined and creamy. 
4. Add more dijon, dill, salt or pepper if needed.
5. Serve on crisp bread with fresh dill on top.

Red pepper and Sunflower Spread 
3 large red peppers (you can also use pre-roasted on jar)
75 g / 1/2 cup sunflower seeds 
a pinch cayenne pepper 
sea salt 
1/2 lemon, juiced 
2 sprigs rosemary, leaves picked


Red pepper and Sunflower Spread
This simple sweet and a little spicy red pepper spread is great on crisp bread or as a side to basically anything. 
1. Preheat the oven to 200°C. 
2. Cut the peppers in half, discard the seeds, place on a baking tray and roast for about 40 minutes, or until slightly charred. 
3. Remove from the oven and leave to cool. 
4. Meanwhile, briefly toast the sunflower seeds, cayenne and salt in a frying pan (or on a separate tray in the oven. 
5. When the peppers are cold, peel the skin away. 
6. Chop them and place in a food processor or blender, add the sunflower seed, lemon juice and rosemary, and purée until smooth. 
7. Taste and adjust the seasoning if necessary. 
8. Transfer to an airtight glass jar. Keeps in the fridge for up to 2 weeks.


Pumpkin & Kale Salad - Green Stories


Pumpkin_Salad_wedding_2

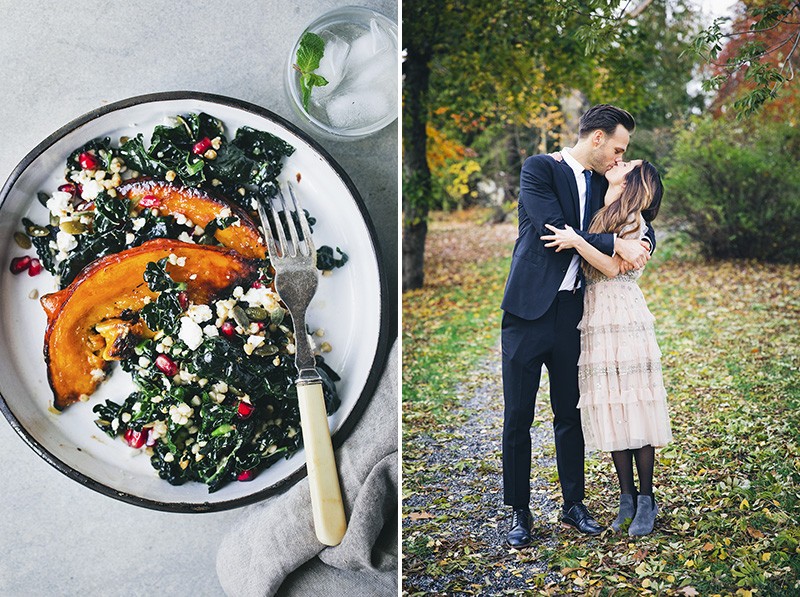
Another salad that they prepared was made with roasted pumpkin, cavolo nero and buckwheat and we have recreated our own version of it here below. We never got the exact recipe from the chef so this is a pretty loose interpretation of how we remembered it (after a couple of glasses of champagne). We are sharing that today along with a few snaps that David’s sister took at the wedding. Forget everything I’ve previously stated about marriage. This was fun! And I feel damn fortunate to marry the most beautiful woman I know.

Lots of love from us!


Wedding_rosendal_6    Pumpkin_Salad_wedding_3

This is a gorgeous and rustic recipe perfect for this season. It would also be ideal for Christmas, maybe with some cinnamon added to the dressing. One of the things we really love about this is that you don’t need to peel the pumpkin (which always is a hassle), just cut into wedges and you can even keep the seeds on. Some of the seeds might get a little burnt but the one hanging on to the slices add a nice crunch. We cover the pumpkin wedges in dressing both before and after roasting to give them a delicious coating.

Roasted Pumpkin Salad with Cavolo Nero & Buckwheat
Serves 4

1 Hokkaido squash, Kent pumpkin or other small winter squash/pumpkin variety
200 g / 4 cups dinosaur kale (cavolo nero) or regular kale, thick stems removed 
1 cup / 250 ml / 170 g raw buckwheat groats, rinsed

Dressing
125 ml / 1/2 cup olive oil
3 tbsp maple syrup
1-2 lemons, juice + zest
1 cm / 1/2 inch fresh ginger, finely grated
Sea salt & pepper

To serve
Pomegranate seeds
1/2 cup / 75 g toasted pumpkin seeds
1/2 cup / 150 g feta cheese

Set the oven to 200°C / 400°F fan mode. Divide the pumpkin in half and then cut it into wedges. Leave any seeds that are hanging on to the wedges and discard the rest. Stir together the dressing, taste and adjust the flavors. Pour about half of it in a bowl and toss the pumpkin slices in it (keep the remaining dressing in the bowl). Place on a baking tray and roast for about 25-30 minutes. We like it a little burnt towards the edges. When roasted, carefully loosen the wedges from the tray and brush them with the remaining dressing in the bowl.

While the pumpkin is roasting, cook the buckwheat groats in 2 cups water for 7-8 minutes until soft but not mushy. Drain any remaining water and leave to cool off a bit. Add the remaining half of the dressing to a large bowl. Tear the kale leaves into smaller pieces, place in the bowl and use your hands to massage them until they soften up. Add the buckwheat to the bowl and toss so it’s all mixed. Arrange the kale and buckwheat on the tray (or a serving plate) together with the pumpkin wedges. Scatter with pomegranate seeds, pumpkin seeds and crumbled feta cheese. Enjoy!

Pumpkin_Salad_wedding_4

Mary Berry’s Victoria Sandwich Cake w/Strawberry Jam and Creme

Sunday, June 21, 2020

Ingredients

  • For The Large All-In-One Victoria Sandwich:
  • 225 g (8 oz) softened butter
  • 225 g (8 oz) caster sugar
  • 4 large eggs
  • 225 g (8 oz) self-raising flour
  • 2 level tsp baking powder
  • 2 x 20cm (8in) greased and lined sandwich tins
  • Or For An 18 Cm (7 In) Victoria Sandwich:
  • 3 large eggs
  • 175g (6oz) of softened butter
  • 175g (6oz) of caster sugar
  • 175g (6 oz) of self-raising flour
  • 1½ teaspoons of baking powder.
  • 2 x 18 cm (7 in) greased and lined sandwich tins
  • Or For A 15 Cm (6 In) Victoria Sandwich (See Cooking Time):
  • 2 large eggs
  • 100 g (4 oz) of softened butter
  • 100 g (4 oz) of caster sugar,
  • 100 g (4 oz) of self-raising flour
  • 1tsp of baking powder.
  • 2 x 15cm (6 in) greased and lined sandwich
  • For The Filling And Topping:
  • 4tbsp strawberry or raspberry jam
  • A little caster sugar, for sprinkling


To serve


Method

Pre-heat the oven to 180°C/Fan 160°C/gas 4. Grease two sandwich tins then line the base of each tin with baking parchment.

Measure the butter, sugar, eggs, flour and baking powder into a large bowl and beat until thoroughly blended. Divide the mixture evenly between the tins and level out.

Bake in the pre-heated oven for about 25 minutes or until well risen and the tops of the cakes spring back when lightly pressed with a finger. Leave to cool in the tins for a few minutes then turn out, peel off the parchment and finish cooling on a wire rack.

When completely cold, sandwich the cakes together with the jam. Sprinkle with caster sugar to serve.

Top tip for making Mary Berry’s Victoria sandwich

The all-in-onemethod takes away the hassle of creaming, and ensures success every time. Baking spreads give an excellent result, but the cake won’t keep as long.


To assemble the cake, place one cake upside down onto a plate and spread it with plenty of jam. If you want to, you can spread over whipped cream too. Top with the second cake, top-side up. Sprinkle over the caster sugar.

Easy Skillet Kale with Lemon & Garlic

Recipe: Easy Skillet Kale with Lemon & Garlic

Updated: Jan 28, 2020

SaveCommentsJump to Recipe
Post Image

While it may feel like kale has overstayed its welcome in the food scene, the hype over the leafy green is very much still alive. Whether that thrills you or makes you groan, knowing the right way to cook it is a total game-changer. 

Easy Skillet Kale With Lemon & Garlic

Mastering this method will convert kale-haters, yes, but it will also inspire kale fans who feared they’d never be able to get it right at home. The good news is that it couldn’t be easier to make awesome kale at home: You need just three ingredients and about five minutes. 

How to Make the Best Sautéed Kale at Home

There aren’t any big secrets to making awesome kale — you just need a large skillet and some basic pantry ingredients. Lots of garlic is a must, plus a good amount of lemon juice, which adds brightness to the inherently earthy green. I also love to use a big pinch of crushed red pepper flakes for a nice, spicy kick, but it’s more than OK to skip it if heat isn’t your thing. This recipe works with any variety of kale — be it the deep, dark Tuscan kind or frilled curly kind. You also don’t need any fancy tools to de-stem the kale: You simply pull the leaves from the stems with your own two hands. 

I do have one little secret, though. Since kale is so fibrous, it can be difficult to cook down the leaves so that they’re tender and not chewy. Some recipes have you add water or broth to the skillet while you sauté the leaves, but it’s not actually necessary. Instead, after you’ve washed the leaves, leave them damp. The water that clings to the leaves will create steam when you toss them in the hot skillet. As the kale cooks, you’ll cover the skillet for a few minutes; that steam will help wilt and break down the kale perfectly. 

Easy Skillet Kale with Lemon & Garlic

YieldServes 4 to 6

Prep time 5 minutes

Cook time 6 minutes

Ingredients

  • large bunches 

    kale, any variety (about 1 1/2 pounds total)

  • tablespoons 

    olive oil

  • cloves 

    garlic, thinly sliced

  • Pinch red pepper flakes (optional)

  • 1/2 teaspoon 

    kosher salt

  • 1/4 teaspoon 

    freshly ground black pepper

  • Juice of 1 small lemon

Instructions

  1. Use your hands to pull the kale leaves from their stems. Coarsely chop the leaves. Rinse them, but do not dry.

  2. Heat the oil in large, wide, high-sided sauté pan over medium heat until shimmering. Add the garlic and red pepper flakes, if using, and cook, stirring, until fragrant, about 1 minute (do not let the garlic brown).

  3. Add the kale a few handfuls at a time, stirring after each addition so that it starts to wilt, until all of the kale is added. Stir in the salt and pepper. Cover and cook, stirring occasionally, until the kale is just tender, about 5 minutes. Remove from the heat, stir in the lemon juice, and serve.

Recipe Notes

Storage: Leftovers can be stored in an airtight container in the refrigerator for up to 5 days.

Mutton pickle for the soul: How non-veg pickles elevate a simple meal

Families in different parts of the country have sworn by them for generations, and now share a taste with us

Prawn pickle at home. When in school, this would be the singular thought on Josephine Rajaratnam’s mind on days her mother placed that bottle on the dining table. She is 80 years old now, but still remembers how she ran home from school to place a dollop of the pickle on a slice of bread and eat it. “I wouldn’t touch any other snacks; not when there was prawn pickle,” she smiles. Once she was older, Josephine learned her mother’s pickle recipes, as well as her grandmother’s. She made and sold them as Aji’s Pickles, until a few years ago. She says that she closed the business down owing to various issues, among them being the fact that making non-vegetarian pickles involves a “lot of work”. But she still makes them for her son and grandchildren when they come visiting.

In most Indian homes, mango, gooseberry, mixed vegetable, garlic, and lemon pickles are a mainstay. Many of us have a tiny peck of them with curd rice to round off a three-course meal. And also with chapatis and dal rice when there is nothing else worth its while to be had as a side. To sum up, vegetarian pickles, are merely sidekicks.

More than just a sidekick Nothing like a bottle or two of fish, prawn, or mutton pickle made lovingly by a special one, to remind one of home

More than just a sidekick Nothing like a bottle or two of fish, prawn, or mutton pickle made lovingly by a special one, to remind one of home  

And then there are some reserved for special occasions — like when a loved one comes home to visit after a long time or when the meat-loving granddaughter packs her bags to leave home for college. Nothing like a bottle or two of fish, prawn, mutton, chicken, or beef pickle made lovingly by the mother, grandmother, uncle or aunt, that will remind them of home. Non-vegetarian pickles are much more than that sad bottle of lemon pickle sitting on the dining table. The meat, soaked in all the masalagoodness, becomes nice and firm. 

Every person in the backwaters-pampered Kumarakom in Kerala has sampled Lily Joy’s home-made fish, clam, prawn, chicken, and beef pickles. No, she doesn’t sell them; Lily ‘Kutty’, as she is popularly known, happily gives away the pickles to friends and relatives. The 50-year-old has been making them ever since she was 16. “I learnt it from my ammachi,” she says, adding, “The main thing to be kept in mind while making pickles is that there should be no water in them, not even a drop.” Lily first marinates the meat in spices, including turmeric, chilli powder and ginger, and shallow-fries them in coconut oil. “I then cook them with more masalas in sesame oil and add vinegar to keep the freshness intact,” she says.

Common threads

Recipes for these pickles may vary from home to home, but all of them have a few common ingredients: sesame oil, ginger, garlic, turmeric, and chilli powder. “The process has three steps,” explains 57-year-old Tasneem Ayub, a Chennai-based home cook who runs Ammees Kitchen. She has been making pickles since 1984. “First is the marination, in which the meat or fish, after being washed well, is soaked in a masala mixture. It is then deep-fried. The final step, is cooking this with more masalas.” Tasneem adds that to make fish pickle, “any fish that is firm to touch” can be used. Seer works well, so does king fish or tuna. 

Chennai-based sound engineer Abraham Varghese found that he had just ₹500 in his pocket one day. He decided to make small quantities of pickles using it: he made prawn, beef, and bitter gourd and put them up on a Facebook group. “They were sold out in less than two hours,” he says. 

Mutton pickle for the soul: How non-veg pickles elevate a simple meal

That’s when Abraham decided that he had a winning recipe at hand, and plunged into the cooking business. He is the man behind Ammini’s Pickles and the recipe is his mother Achamma’s. The 52-year-old is serious about his pickles. “A pickle is different from a thokku,” he says. “The former should have minimal gravy and should be made with only two types of oil. In the south, it is sesame oil, and in the north, it is mustard.”

His pickles, he says, are good for up to two years, without refrigeration. “I don’t add coriander powder and tomatoes; the garlic and ginger used should ideally be those that have aged, and not fresh.” Abraham prefers Kashmiri chilli powder, that he adds after the cooking is done. “This gives the bright red colour,” he explains. It takes him two days to prepare a batch of 100 kilograms of pickle — he makes fish, squid, green mussels, beef, mutton, and free-range chicken. According to him, “pickle is like wine. It tastes best as it ages.”